
Release date: October 12th 2023, updated December 30th 2023
Welcome to my ControlUp section. Here I will show how I installed the ControlUp Server On-Premises. As I mentioned during planning, the ControlUp server plays a pivotal role in the ControlUp infrastructure, serving as the central hub for monitoring, managing, and analyzing the performance of IT environments. It acts as a control center, orchestrating the flow of data and facilitating various functionalities within the ControlUp platform.
The primary roles and functions of the ControlUp server:
- Centralized Management – The ControlUp server provides a centralized management console that allows administrators to oversee and manage multiple aspects of their IT environment from a single interface. It aggregates data from various monitored resources, enabling comprehensive visibility and control.
- Data Aggregation and Analysis – It collects data from agents deployed on monitored endpoints, consolidating real-time metrics on system performance, resource utilization, application insights, and user activity. The server processes and analyzes this data, providing actionable insights and reports to aid in performance optimization and troubleshooting.
- Configuration and Policy Management – It facilitates the configuration and management of ControlUp settings, policies, and thresholds. Administrators can set up alerts, define performance thresholds, create automated actions, and apply policies to maintain optimal performance and respond promptly to any issues detected within the environment.
- User Experience Monitoring – ControlUp server plays a crucial role in monitoring user experience by capturing and analyzing data related to user logins, application responsiveness, session performance, and resource utilization. This information helps in identifying and resolving issues affecting end-user productivity.
- Integration and Extensibility – It serves as an integration point for various third-party tools and solutions, allowing ControlUp to collaborate with other systems and extend its functionalities. Integration capabilities enable administrators to leverage additional tools for specific tasks or workflows, enhancing the overall management capabilities.
- Dashboard and Reporting – The server hosts dashboards and reporting functionalities, presenting comprehensive visualizations and reports based on real-time and historical data. These visual representations help in quick decision-making, trend analysis, and performance evaluation of the IT infrastructure.
- Scalability and Performance Optimization – It supports scalability by efficiently managing resources and optimizing performance. The ControlUp server is designed to handle large-scale deployments and data processing requirements while ensuring minimal impact on system performance.
Overall, the ControlUp server acts as the nerve center of the ControlUp platform, facilitating efficient management, monitoring, analysis, and optimization of IT environments. Its centralized functionalities empower administrators with the tools and insights necessary to maintain a high-performing and stable infrastructure.
As pr. ControlUp’s documentation here: ControlUp On-Premises Server Installation, the prerequisites for the ControlUp Server are:
- Windows Server 2016 or later.
- .NET Framework 4.8 or later.
- Member of an AD domain.
- The domain controller must be accessible during installation.
Before I start the installation, I check that I have the DigiCert Trusted Root G4 certificate present in the Trusted Root Certification Authorities store.

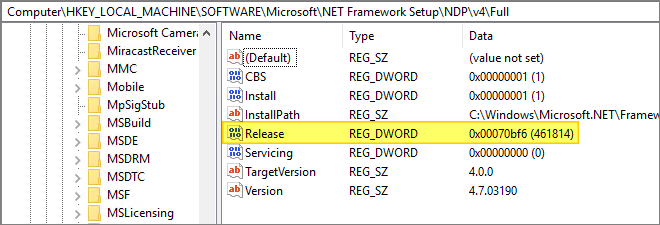
As the Prerequisite for installing this version of ControlUp server, is .NET Framework 4.8 or later, I must verify the installed version of .NET Framework. This I do by checking the Registry. According to Microsoft’s “How to: Determine which .NET Framework versions are installed“, the Release 461814 corresponds to version .NET Framework 4.7.2
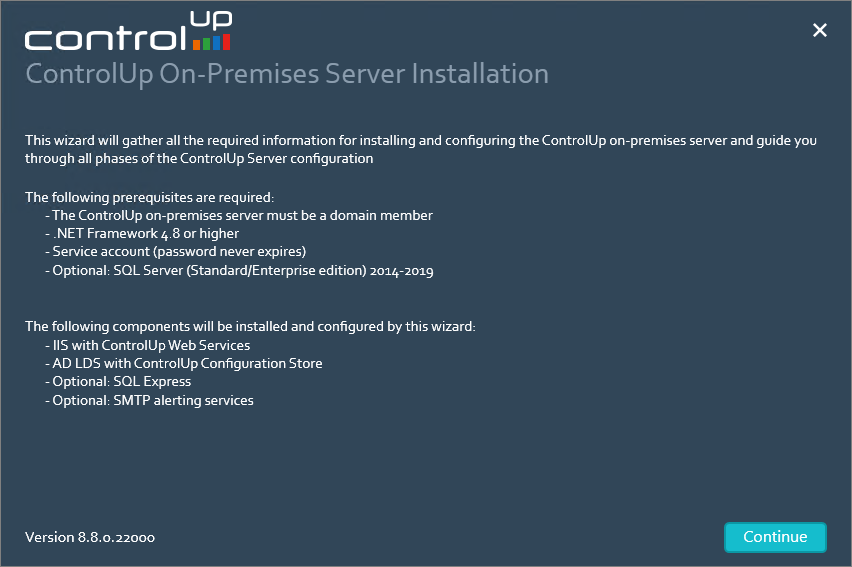
Before I continue, I download and upgrade .NET Framework as described by Microsoft here: Microsoft .NET Framework 4.8 offline installer for Windows. Once done, I locate the installer I downloaded, unzipped and launch the executable. This opens the ControlUp Server wizard’s welcome screen, Continue…

In the next screen, I agree to the EULA Tems of Use, Accept…

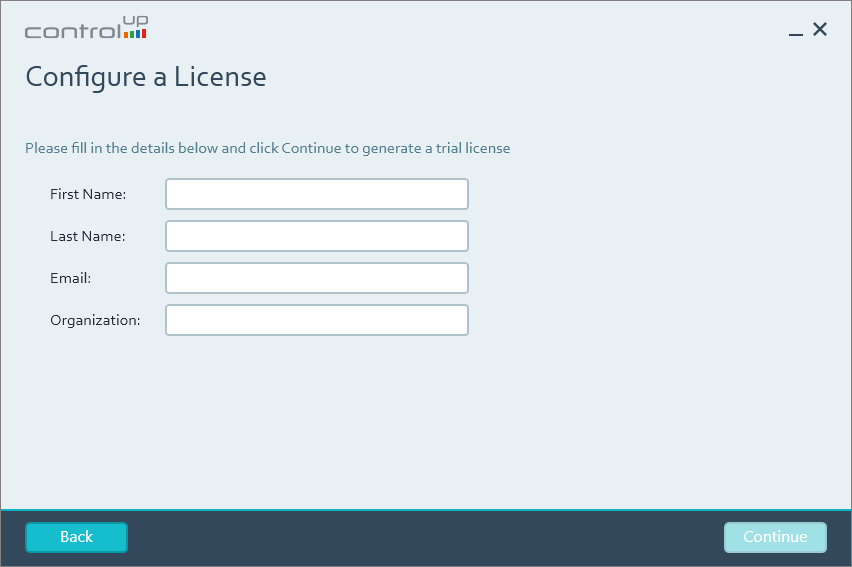
As this is a Lab Setup, the Trial License will work just fine, Continue…

I provide the details needed to generate a trial license, Continue…
The suggested destination folder looks fine, Continue…

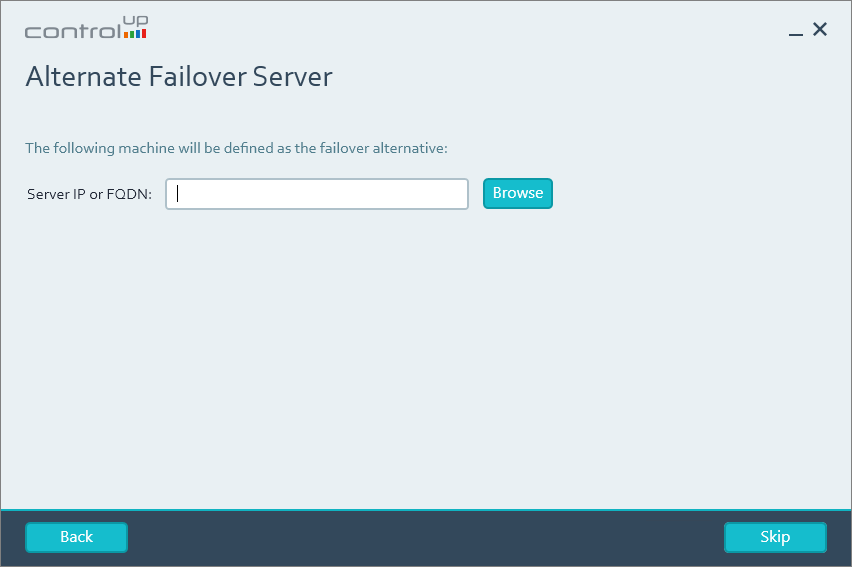
I wont be configuring a failover server at this point, Skip…
I provide the credentials for my service-account, Continue…

The Light Mode will be sufficient for this Lab Setup. I provide a password for the SQL User, Continue…

I wont be importing any Script Actions at this point, Skip…

I wont be importing any Virtual Expert rules and Automated Actions at this point, Skip…

I wont be configuring any Mail Server Settings at this point, Skip…

For simplicity, I authorize the Domain Users group as ControlUp Authorized Users, Continue…

In the next screen, I can configure the ControlUp Insights On-Premise settings. I provide the FQDN of my Insights server and the UNC paths to the ActivityFiles and BackupFiles folders, Continue…

In the next screen I can configure the ControlUp Solve On-Premise settings. I provide the FQDN of my Solve server and the Secret Key json file I exported as described in this session: ControlUp On-Premise – Solve – Export JWT, Continue…

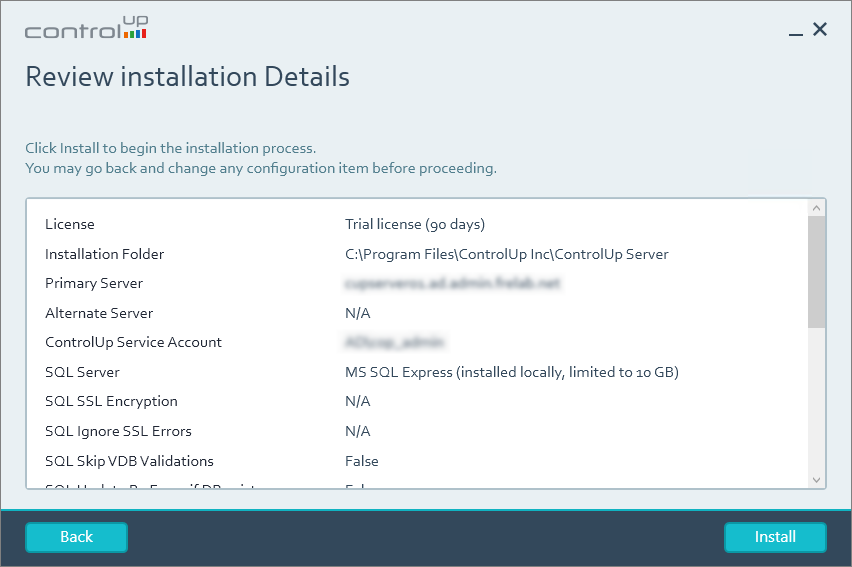
Finally, I review the settings and click Install…
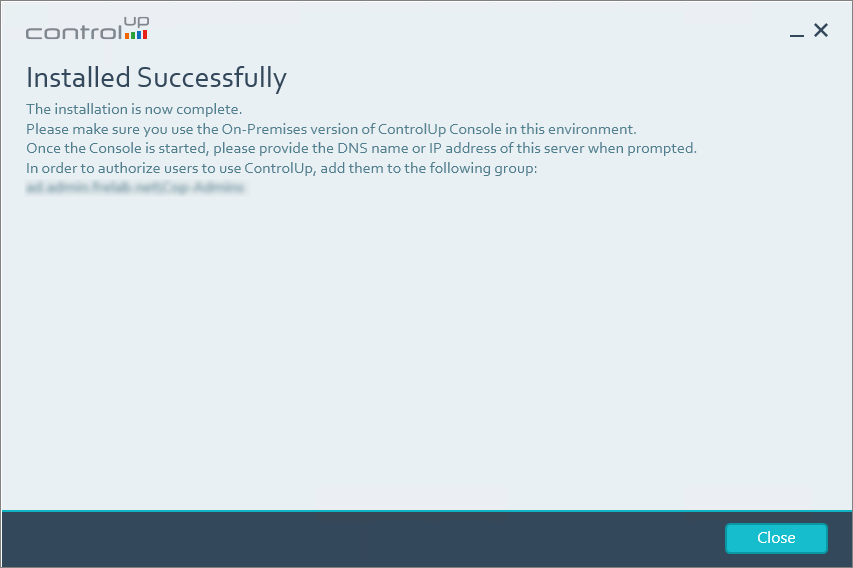
The installation was successful, Close…
ControlUp On-Premises setup:
- Solve
- Insights
- ControlUp Server
- Real-Time Console
- Define Credentials
- Connect VMware vCenter
- Connect VMware Horizon
- Monitor
- IOP Forwarder
- Agent (Silent)
- RemoteDX
Official ControlUp documentation:
- Welcome to ControlUp for VDI & DaaS
- ControlUp On-Premises Server Installation
- ControlUp Architecture – On-Premises
Other miscellaneous Tips & Tricks
Disclaimer: Every tips/tricks/posting I have published here, is tried and tested in different it-solutions. It is not guaranteed to work everywhere, but is meant as a tip for other users out there. Remember, Google is your friend and don’t be afraid to steal with pride! Feel free to comment below as needed.
