
Welcome to my VMware App Volumes series. In this session, I will create a custom writable volume template. There are different reasons for doing this, but in this instance, I need to create a custom writable template that is larger than the pre-deployed template_uia_only.vmdk. The procedure is the same for creating custom AppStack templates. For more info about configuring storage for writable volumes etc, check out VMware’s info here: Configuring Storage for AppStacks and Writable Volumes
To do this, I first launch a Windows 10 VM without App Volumes Agent installed. This is a clean Windows 10 VM with only the system partition as shown below.

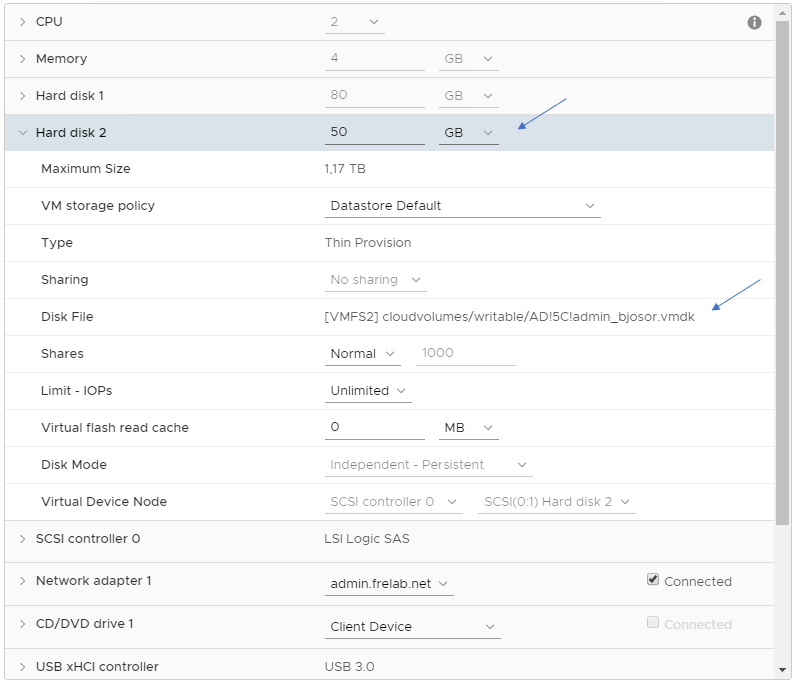
In the Vmware vSphere Webclient, I create a new thin-provisioned disk of my desired size, and attach this to my VM. In this example I will size it to 50 GB

Next I attach the …/writable_templates/template_uia_only.vmdk to the VM


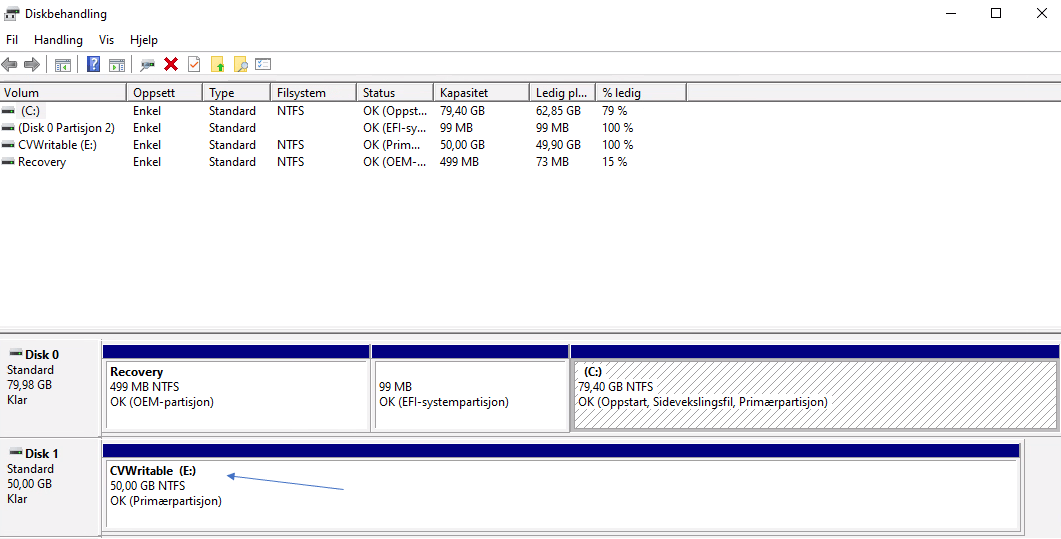
I power up my VM and inside Windows, I launch Disk Management

As we can see from the image above, I now have an un-initialized Disk 1. The first thing to do now is to initialize the new 50 GB template disk by selecting MBR (Master Boot Record) and then click OK

Next I create a Simple Volume on this disk using the New Simple Volume Wizard. I assign all the storage, assign a drive letter, use NTFS as file system and “CVWritable” as Volume Label

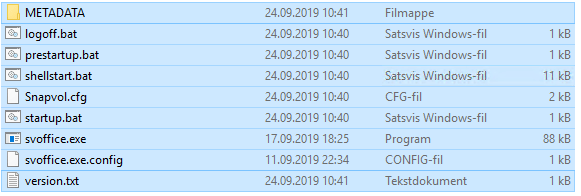
Next I will copy all the files and folder from the original template, mounted to E: to my new template, mounted to D:
Before I can do that I have to make sure to disable the following settings in Windows Explorer Options:
- Hide empty drives in the Computer folder
- Hide extensions for known file types
- Hide protected operating system files (Recommended)
I power down the VM and detach both disks from Virtual Machine, do NOT delete!

Next, using Putty, I log into an esxi-server and copy my newly created template to /cloudvolumes/writable_templates/ folder. (Both flat and stub file). I first browse to my VM’s folder and the cloudvolumes folder.
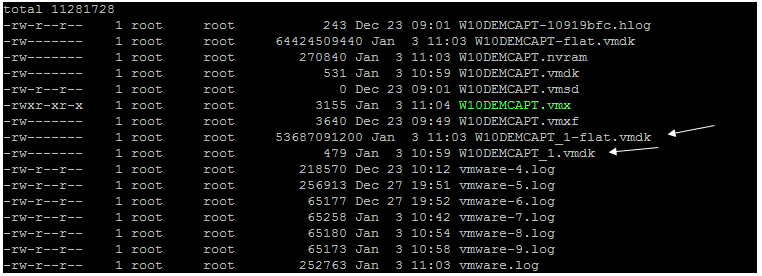

I move the vmdk-files to the cloudvolumes/writable_templates folder using these commands:
“mv /vmfs/volumes/59df2edc-18febe94-a59f-001018d61a80/W10DEMCAPT/W10DEMCAPT_1.vmdk /vmfs/volumes/59df2ef9-04c1a8dc-f48b-000af7305990/cloudvolumes/writable_templates”
“mv /vmfs/volumes/59df2edc-18febe94-a59f-001018d61a80/W10DEMCAPT/W10DEMCAPT_1-flat.vmdk /vmfs/volumes/59df2ef9-04c1a8dc-f48b-000af7305990/cloudvolumes/writable_templates”
I run the following command to ensure that the vmdk has remained thin-provisioned during the file move
“vmkfstools –K W10DEMCAPT_1.vmdk”
(I you get an error when you run the vmkfstools command, as I did when I copied it into putty, «Extra arguments at the end of the command line», type in the command manually instead of copy!)

Next, I rename the vmdk-files using the following commands:
“mv W10DEMCAPT_1.vmdk template_uia_only_50GB.vmdk”
“mv W10DEMCAPT_1-flat.vmdk template_uia_only_50GB-flat.vmdk”

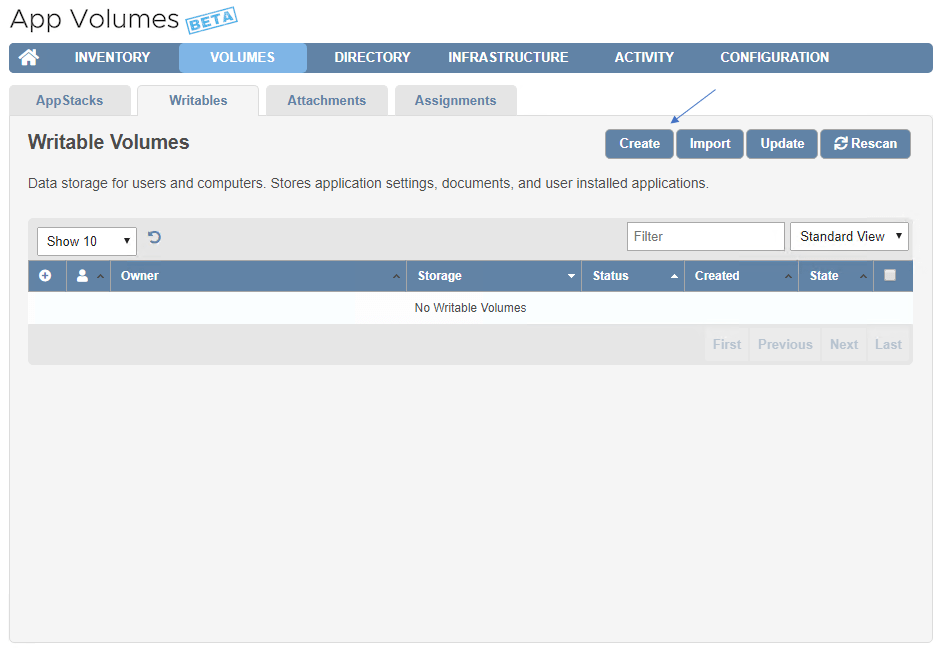
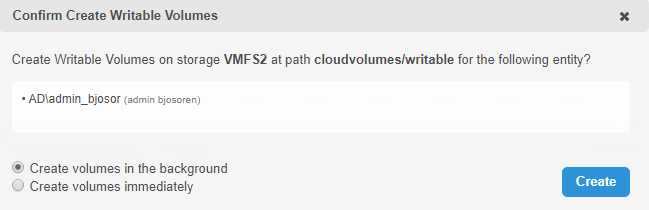
Finally I test this template by assigning it to my test user in App Volumes Manager
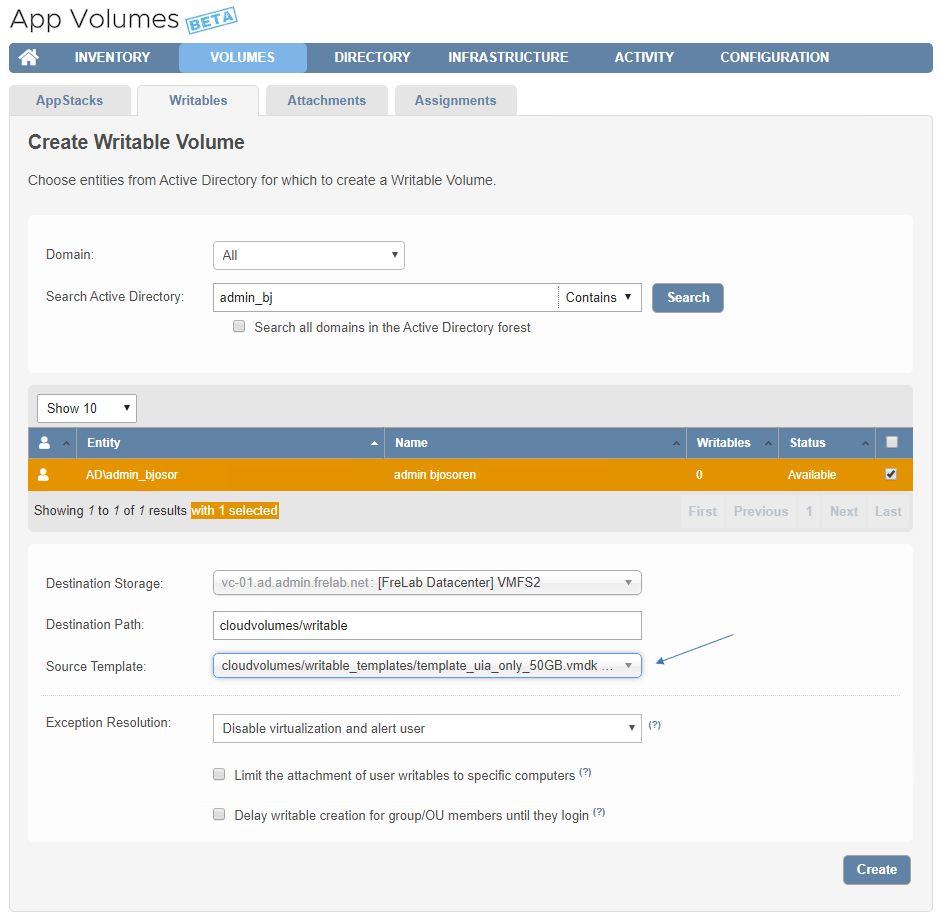
I make sure to select my new template as source
When I log my testuser in on a Horizon Desktop, I can now verify the new writable volume created and attached to the virtual desktop.
Inside Windows, if I open Disk Management, I see the writable volume attached as supposed.
This concludes my little session about custom template creation, as I mentioned to begin with, the method is pretty similar for creating custom AppStack templates.
Recommended reading: VMware KB 2116022: Creating a new App Volumes AppStack template VMDK smaller than 20 GB
VMware App Volumes Product Page
VMware App Volumes planning, deployment etc.
Disclaimer: Every tips/tricks/posting I have published here, is tried and tested in different it-solutions. It is not guaranteed to work everywhere, but is meant as a tip for other users out there. Remember, Google is your friend and don’t be afraid to steal with pride! Feel free to comment below as needed.