
Welcome to my VMware App Volumes series. In this session I will describe how I migrated the App Volumes database to my new Always-On SQL Cluster. This exercise will involve the following tasks:
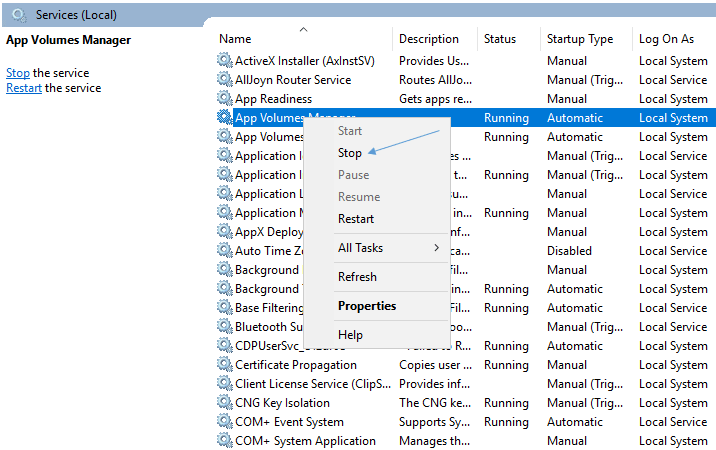
- Shutdown App Volumes Manager service
- Backup Database on existing SQL server
- Restore database in SQL cluster
- Create Login
- Create Availability Group and listener
- Change ODBC Settings on App Volumes Managers
- Edit database.yml file
- Start App Volumes Manager Service
- Verify functionality and test failover
Shutdown App Volumes Manager service
Backup Database on existing SQL server
Create a Copy-only-backup on existing SQL server and take database offline. In SQL Server Management Studio, right-click AppvolDB, Task, Back Up…

Tick “Copy-only-backup”, choose destination, OK


Copy the appvoldb.bak file to one of the SQL servers in the SQL AlwaysOn-cluster

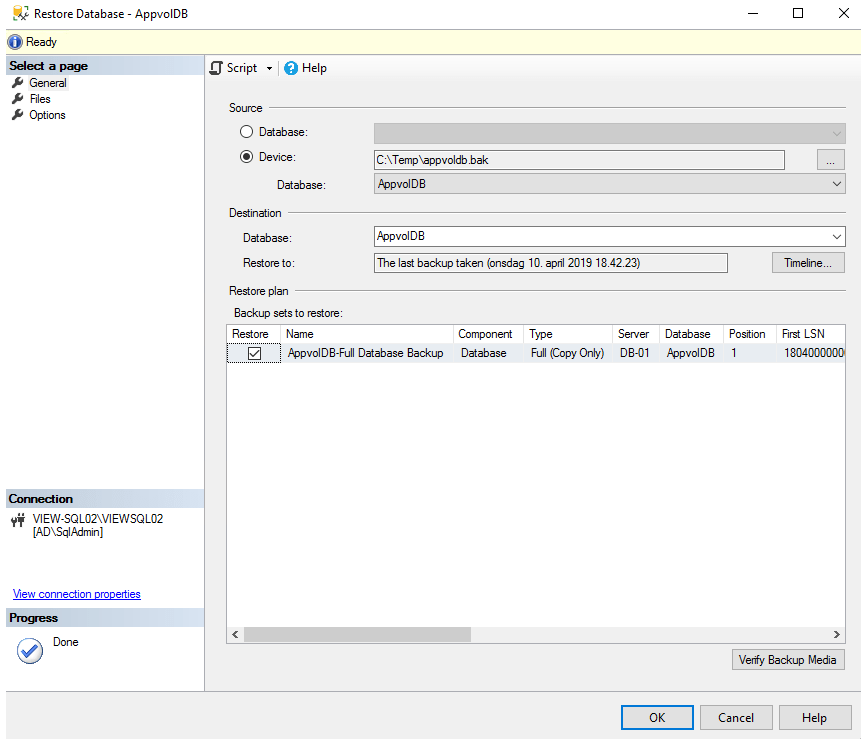
Restore database in SQL cluster
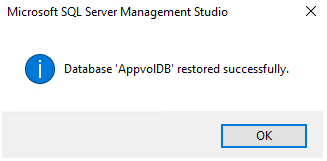
Open SQL Server Management Studio on one of the nodes in SQL cluster, Restore Database…

Browse and select appvoldb.bak file
Create Login
Verify that the appvol user is added as security login on new database server

Create Availability Group
Take backup of the AppvolDB on the new SQL server prior to creating availability group.


Right click Availability Groups, select New Availability Group Wizard

I give the availability group a somewhat meaningful name, Next

Select the AppvolDB database, Next

I add my replica and check “Automatic Failover”, click the Listener tab…

I enter a Listener DNS Name and Port. I click Add to enter a static ip-address. This will automatically be added to DNS, Next

Automatic seeding looks good, Next

Validation looks green, great! Next.

Finish

Nice, successfully created the availability group, Close

I verify that I can make a connection on port 1433 to my new listener FQDN

Change ODBC Settings on App Volumes Managers
I log in on the App Volumes Manager server and change both 32-bit and 64-bit ODBC Settings. I have documented the 32-bit procedure below, but the same change applies to the 64-bit DSN. Select svmanager 32-bit, Configure

I enter my listener-address, Next

Enter SQL user-info, Next

I check and modify the default database setting, Next

Finish

I test the new ODBC settings

Successful change, OK

Finally I make the same changes to my 64-bit DSN
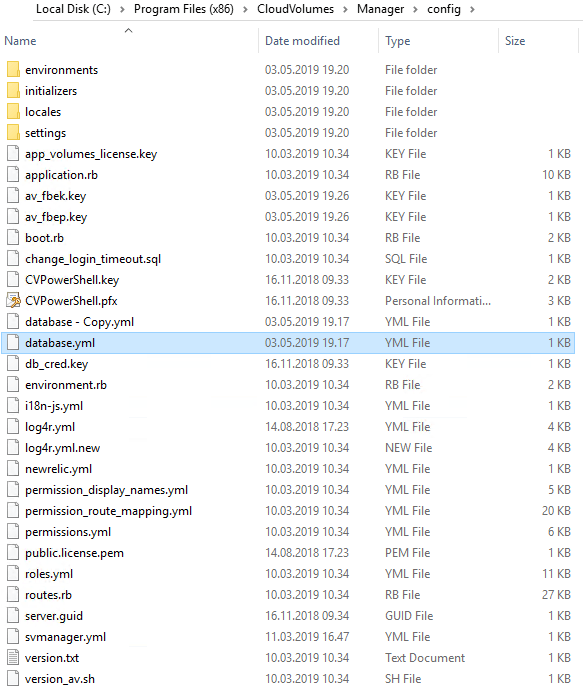
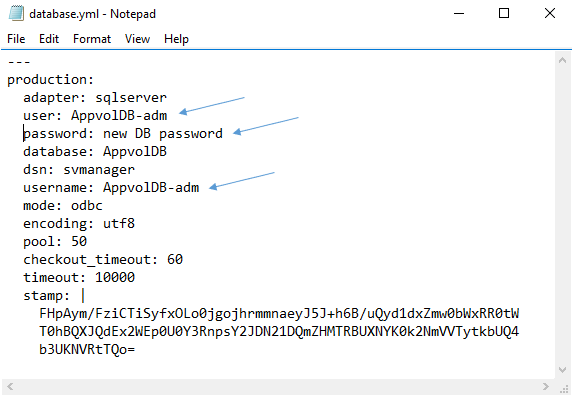
Edit database.yml file
Make a copy of the database.yml-file, in “C:\Program Files (x86)\CloudVolumes\Manager\config”, and edit it
Edit the user, username and add password, save and close database.yml file.
Start App Volumes Manager Service
Prior to testing failover, I make sure to replicate sql user accounts to my secondary sql-server, as described by Microsoft here: How to transfer logins and passwords between instances of SQL Server
I start the App Volumes Manager service and check Event Viewer for errors

Verify functionality and test failover
I log in to App Volumes Manager and verify functionality and settings

Updating App Volumes Manager by changing the database credential (2101109)
VMware App Volumes Product Page
VMware App Volumes planning, deployment etc.
Disclaimer: Every tips/tricks/posting I have published here, is tried and tested in different it-solutions. It is not guaranteed to work everywhere, but is meant as a tip for other users out there. Remember, Google is your friend and don’t be afraid to steal with pride! Feel free to comment below as needed.