
Modified:
Welcome to my Yubikey SmartCard series. As part of my upcoming post about SmartCard Setup in Omnissa Horizon using Yubikey, I needed to prepare my CA with certificate templates. In this session I will show how I configured a certificate template to enroll on behalf of users. This session is built on Yubico’s own documentation, although I added screenshots and adjusted/clarified some sections I thought were unclear. As I only have a MS CA server, that is the one that is used in this session.
Using Enrollment on Behalf (EOB) to enroll users for smart cards offers convenience and can be useful for users who cannot enroll themselves, but it introduces security risks if not managed properly. Pros include streamlining the process for users unable to perform it personally and allowing administrators to manage the process centrally, while cons center on the potential for misuse, errors, and elevated security risks associated with an intermediary handling sensitive information
Creating a smart card login certificate-template for enrolling on behalf of other users
In order for administrators and privileged service desk users to enroll YubiKeys for other users, the CA must be set up to do so. This section provides instructions on setting up a CA to support an enrollment agent to allow for the enroll on behalf functionality.
To create a smart card certificate-template for enrolling on behalf of other users, first login on the CA Server…
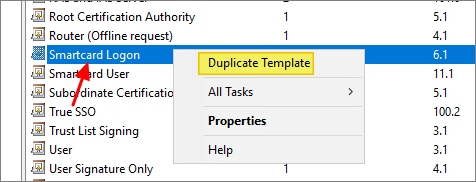
- Right-click the Start button and select Run, type certtmpl.msc and press Enter. Click Certificate Templates, locate and right-click Smartcard Logon, and select Duplicate Template…
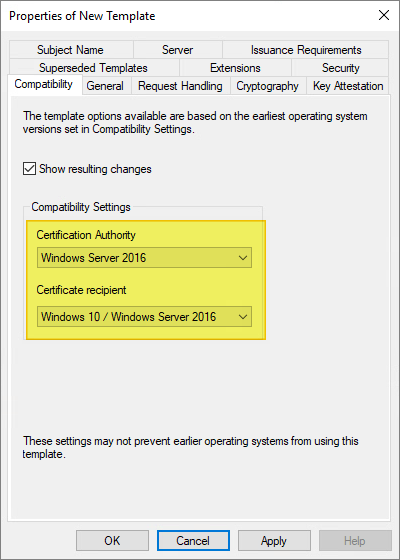
On the Compatibility page, make the following changes as needed:
- Select the operating system where the Certification Authority resides.
- For Certificate recipient select the oldest Windows operating system in your domain environment.
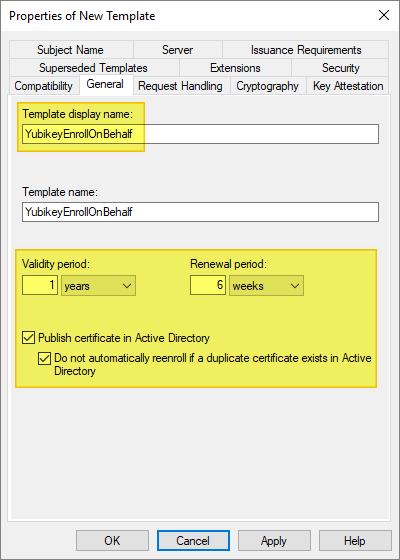
Select the General tab, and make the following changes, as needed:
- For Template display name / Template name, we recommend that you choose a short name without spaces such as YubiKey or YubicoSC.
- For Validity period, ensure the timeframe you specify does not exceed the restrictions for your Certification Authority.
- Optionally, to prevent users from re-enrolling multiple certificates without Administrator approval:
- Select the option Publish certificate in Active Directory.
- Select the option Do not automatically reenoll if a duplicate certificate exists in Active Directory.
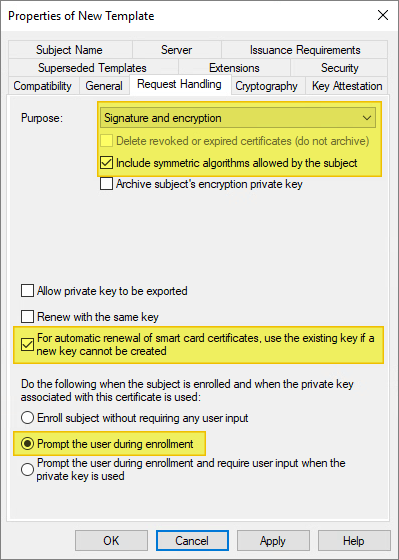
Select the Request Handling tab, and make the following changes as needed:
- For Purpose, select Signature and encryption.
- Ensure the option to Include symmetric algorithms allowed by the subject is selected.
- Ensure the option to Renew with the same key is NOT selected. This option may be disabled if Windows 7 and below are included in the Compatibility settings.
- Ensure the option For automatic renewal of smart card certificates, use the existing key if a new key cannot be created is selected.
- Ensure this option to Prompt the user during enrollment is checked.
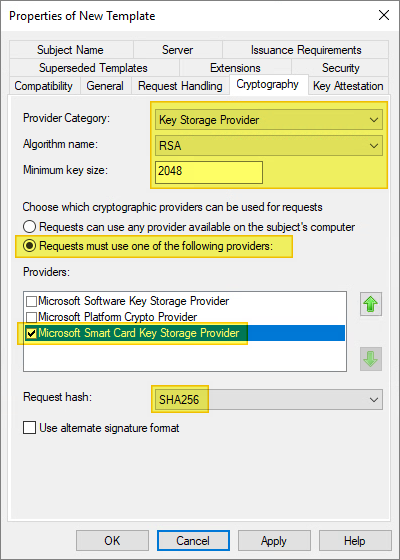
On the Cryptography tab, make the following changes, as needed:
- For Provider category, click the arrow and select Key Storage Provider from the dropdown.
- For Algorithm name, select either RSA, ECDH_P256, or ECDH_P384 from the list displayed.
- Note: ECDH_P521 is not supported.
- Note that if an ECDH algorithm is selected, the client Windows machines need to have Elliptic Curve Cryptography (ECC) Certificate Login support added using Group Policy or by editing the registry. See the following section for instructions.
- For Minimum key size, if you selected RSA in the previous step, enter 2048. If you selected ECDH_P256 or ECDH_P384 in the previous step, this field is automatically populated.
- Select the option for Requests must use one of the following providers:
- Under Providers, select Microsoft Smart Card Key Storage Provider.
- Click the arrow for Request hash and select SHA256 from the list displayed.
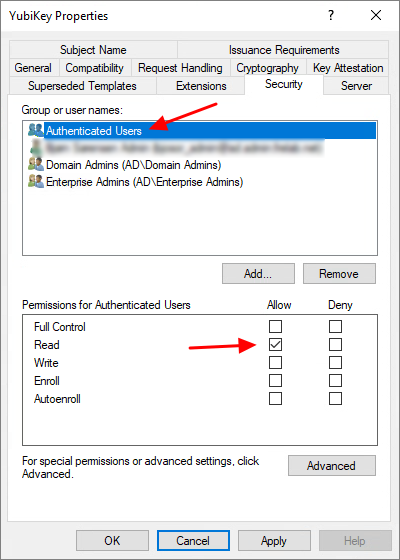
On the Security tab, make the following changes, as needed:
- For Group or user names: Confirm Authenticated Users is listed. If is not, click Add, enter the name of the group, and then click OK.
- For Permissions for Authenticated Users, be sure the option for Read is checked.
- For any administrator, group, or user who needs to create certificates for others, be sure the option for Read and Enroll is checked.
On the Issuance Requirements tab, make the following changes, as needed:
- Be sure the option is selected for This number of authorized signatures, and enter 1.
- For Policy type required in signature, select Application policy.
- For Application policy, select Certificate Request Agent.
- For Require the following for reenrollment:
- Same criteria as for enrollment: This will force the user to again visit the enrollment agent for renewal of the smart card certificate.
- Valid Existing certificate: This will allow users to renew their certificates using the existing certificate by proving they have a valid certificate.
- Note: This setting is a policy choice. If you prefer users meet face-to-face with an Enrollment agent to renew their certificate, choose Same criteria as for enrollment. If you prefer to empower users to renew their own certificate without enrollment agent assistance, choose Valid existing certificate.

Click OK to close the template properties window. Close the Certificate Templates MMC Snap-in.
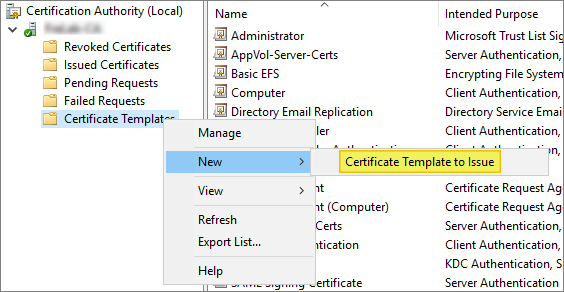
To add the template to the certification authority, right-click the Start button and select Run. Type certsrv.msc and press Enter.
Click Certification Authority, double-click your server, double-click Certificate Templates, right-click on the white space within the center pane, select New and then select Certificate Template to Issue.
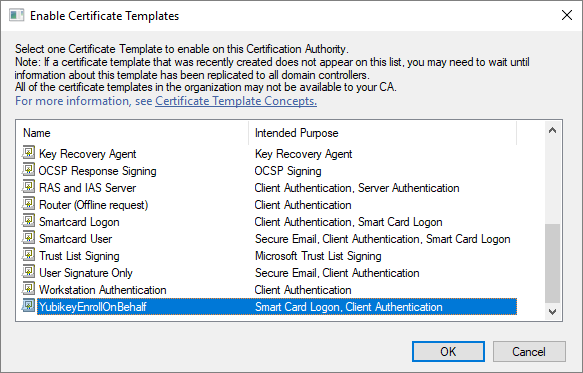
Locate and select the recently created self-enrollment template, and then click OK
Yubico documentation: Setting up smart card login for enroll on behalf
To specify the permissions for the enrollment agents and publish the certificate template
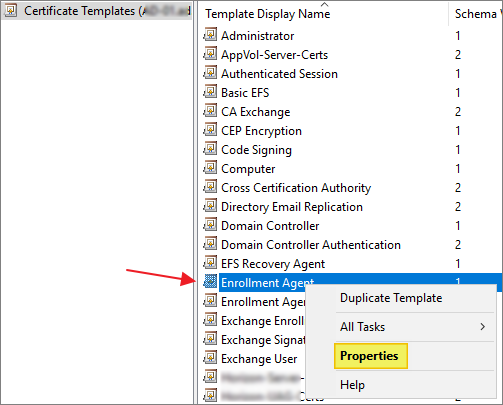
Right-click the Start button and select Run. Type certtmpl.msc and press Enter.
Right-click the Enrollment Agent template, and then click Properties.
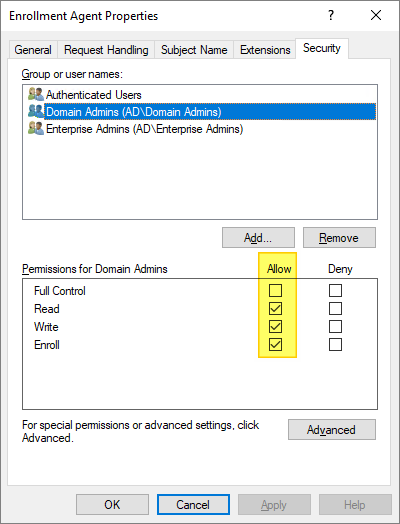
On the Security tab, make sure the user or group designated as an Enrollment Agent has Read and Enroll permissions on the template, and then click OK.
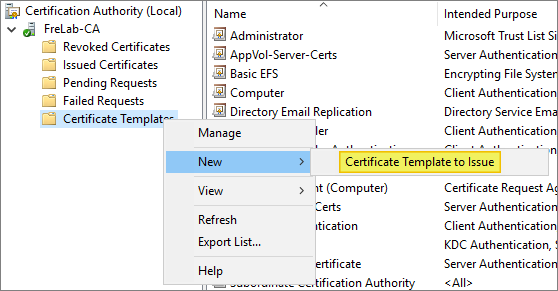
In the Certificate Authority window, right-click the Certificate Templates folder, and select New, and then select Certificate Template to Issue.
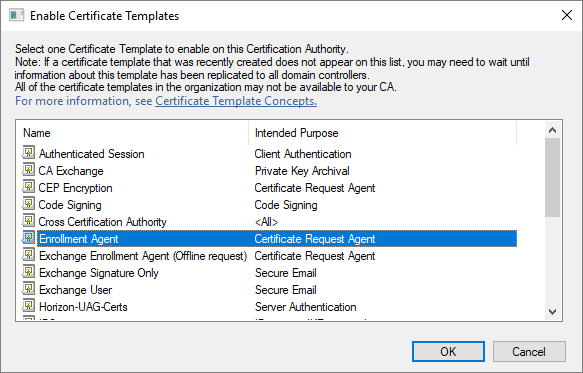
Select the Enrollment Agent template, and click OK. The Enrollment Agent certificate automatically saves to the user’s default file save location.
To create an enrollment agent
A certificate enrollment agent is a user who has been issued a special certificate that allows them to request or enroll for certificates on behalf of other users. A certificate based upon the Enrollment Agent Template I created above. This is a security feature often used by administrators or automated systems for tasks like issuing smart cards or handling certificate requests that are not directly initiated by the end-user.
Typically, this procedure would be done on a “Carding-station”, a domain-joined workstation with the Yubikey Minidrivers installed. I first log in with a user with permissions on the Enrollment Agent Certificate Template I created above, (Member of Domain Admins group).
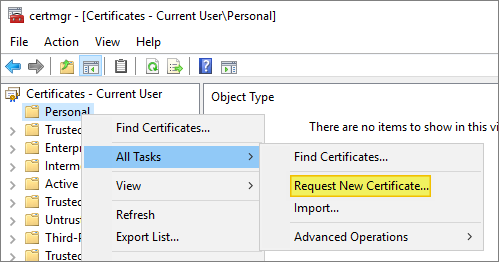
Right-click the Start button and select Run. Type certmgr.msc and press Enter. Under Console Root, click to expand Certificates – Current User.
Click to expand Personal. Click to select Certificates.
Right-click on the white space within the center pane, select All Tasks, and then select Request New Certificate…
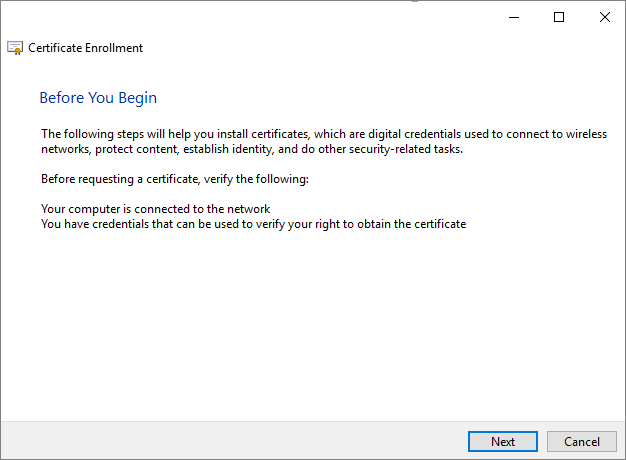
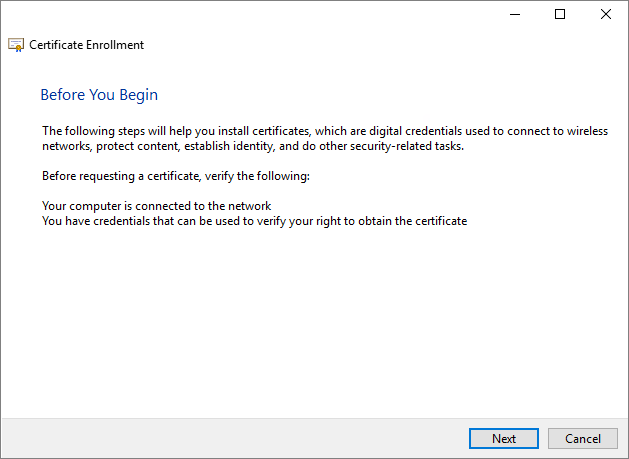
Click Next.
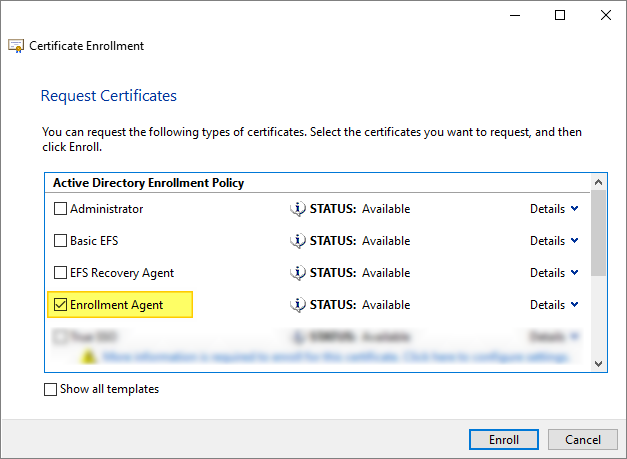
Select Active Directory Enrollment Policy and then click Next.

Locate and select the Enrollment Agent template, and then click Enroll.
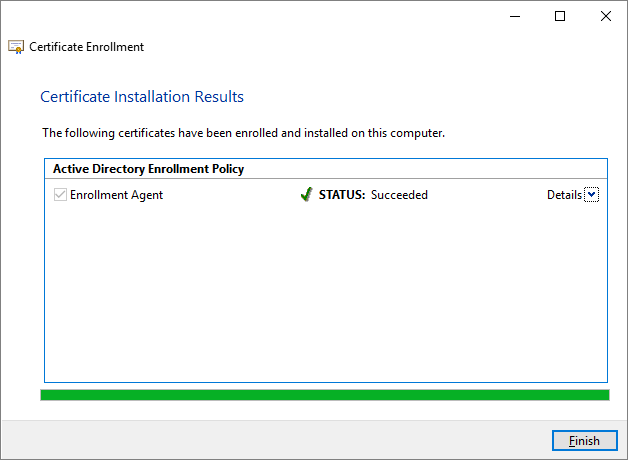
Finish…
To use an enrollment agent to “enroll on behalf of”
Typically, this procedure would be done on a “Carding-station”, a domain-joined workstation with the Yubikey Minidrivers installed. To request a certificate on behalf of a user, I log in with the same user I used above to request the Enrollment Agent certificate.
Right-click the Start button and select Run. Type certmgr.msc and press Enter.
Under Console Root, click to expand Certificates – Current User. Click to expand Personal.
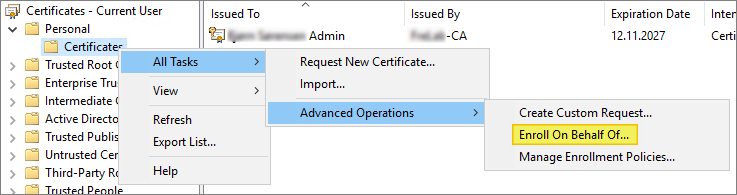
Right-click on the white space within the right pane, select All Tasks, select Advanced Operations, and then select Enroll on Behalf of.
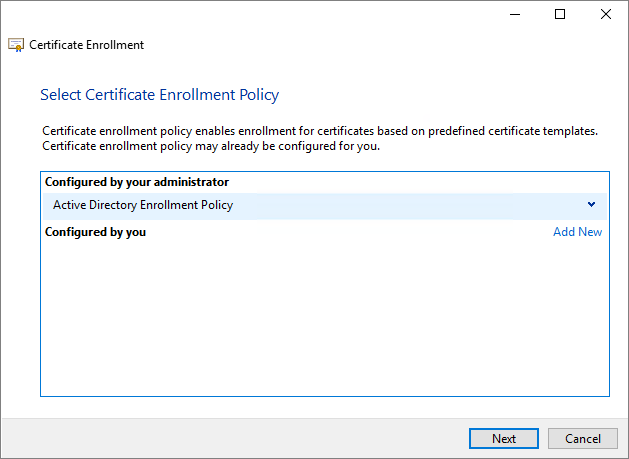
Select Active Directory Enrollment Policy and then click Next.
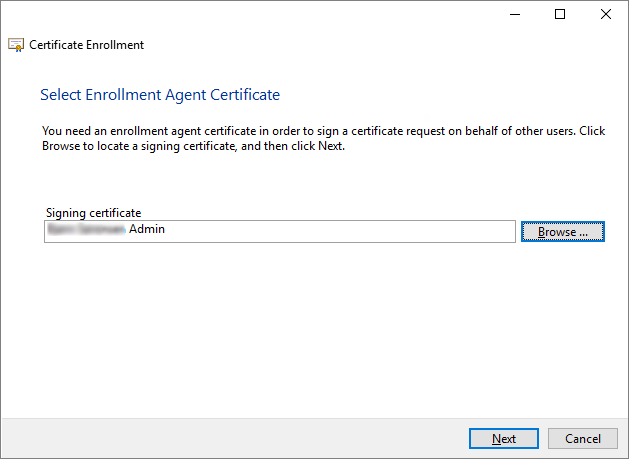
I click Browse and choose the enrollment agent certificate from the Security Pop-up screen, and then click Next.
Locate and select the smart card template I created for enroll on behalf of, and then click Next.

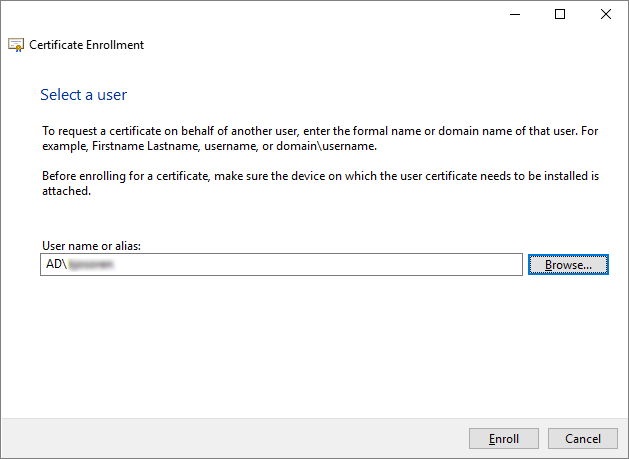
Click Browse, select the user I want to enroll, and then click OK.
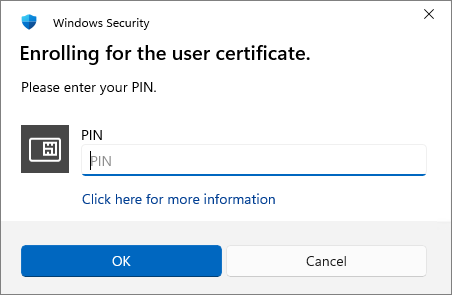
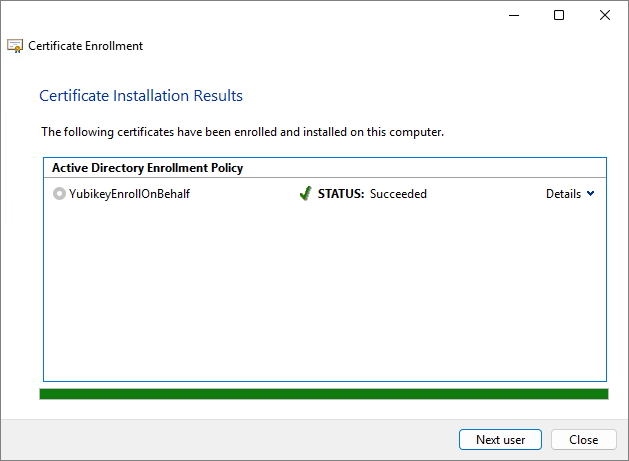
Enter the PIN for the Smart Card and then click OK. The YubiKey will be loaded with a certificate for the selected user. It is recommended that users change their PIN once the certificate is loaded: YubiKey PIN and PUK user management in Windows
Yubico Documentation:
- Setting up smart card login for enroll on behalf
- YubiKey PIN and PUK user management in Windows
- Setting up smart card login for user self-enrollment
Yubico Troubleshooting:
- Smart card basic troubleshooting
- Troubleshooting the auto-enrollment prompt not showing
- Resetting the smart card (PIV) application on the YubiKey
Disclaimer: Every tips/tricks/posting I have published here, is tried and tested in different it-solutions. It is not guaranteed to work everywhere, but is meant as a tip for other users out there. Remember, Google is your friend and don’t be afraid to steal with pride! Feel free to comment below as needed.
