
Release date: October 31st 2023
Welcome to my VMware Horizon series. In this session I will show how to set up NVIDIA GPU for use in an air-gapped environment. Before I can begin, I verify that my VMware vSphere and Horizon versions are supported by NVIDIA:
Virtual GPU Software Supported Products
Virtual GPU Software R535 for VMware vSphere Release Notes
As I’m using vSphere 8 and Horizon 2306, this seams to be a valid combination.
Prerequisites:
- Horizon Enterprise edition license or Horizon Apps Advanced edition license for Horizon 8
- Supported NVIDIA GPU
- NVIDIA GRID vSphere drivers compability with vSphere version
- Horizon compability with Nvidia drivers
- WinSCP and Putty
Preparation:
To prepare for this setup, I have first registered for a Trial License from NVIDIA here: Virtual GPU Software Evaluation. Once done, I have access to download both the “NLS License Server (DLS) 3.2 for VMware vSphere” and “Complete vGPU 16.1 package for VMware vSphere 8.0 including supported guest drivers”, from the NVIDIA Application Hub.
Procedure:
I have identified the following tasks to get this setup done:
- VMware ESXi driver install
- Deploy and configure License server appliance (Air-Gapped mode)
- License Server setup NVIDIA Portal
- VM setup and Windows driver install
- VMware Horizon Desktop Pool configuration
- Test and verification.
VMware ESXi driver install
I will first enable SSH on the ESXi-server to be able to transfer the NVIDIA VIB file to the server and to install the driver

Next, I copy the vib file to the /tmp folder on the ESXi-server using WinSCP


Before I install the host driver, I put the ESXi server in maintenance mode. I connect using Putty and install the driver

[root@esxi01:/tmp] esxcli software vib install -v /tmp/NVD_bootbank_NVD-VMware_ESXi_7.0.2_Driver_525.85.07-1OEM.702.0.0.17630552.vib
Installation Result
   Message: Operation finished successfully.
   Reboot Required: false
   VIBs Installed: NVD_bootbank_NVD-VMware_ESXi_7.0.2_Driver_525.85.07-1OEM.702.0.0.17630552
   VIBs Removed:
   VIBs Skipped:
As pr. the Nvidia documentation, I do a reboot

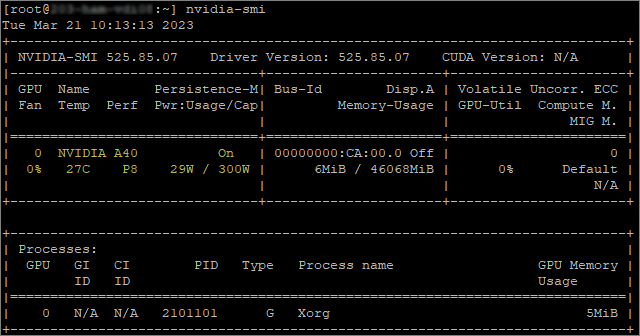
Once the ESXi-server has rebooted, I can now verify the status by running the following command in Putty
nvidia-smiAs we can see, it identifies the Nvidia A40 GPU correctly
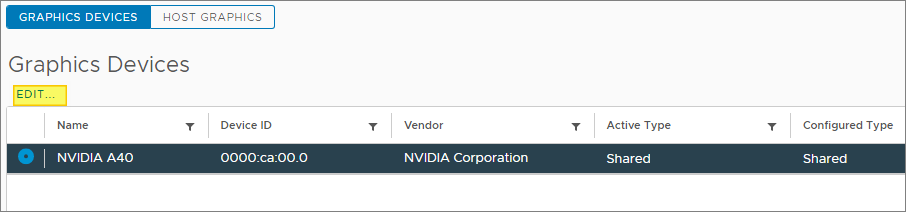
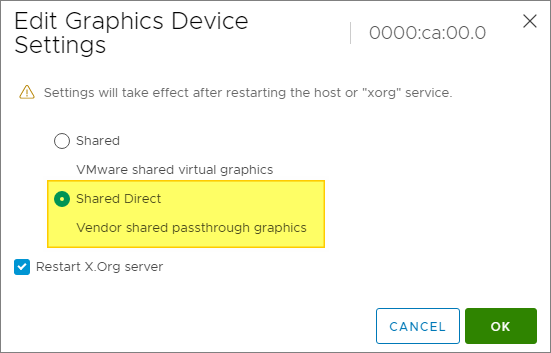
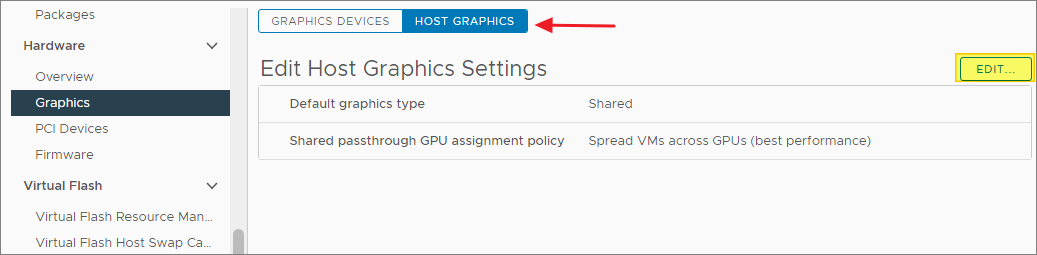
Next, I configure Graphics Devices and the Host Graphics to use “Shared Direct“

I will also disable Memory ECC as described by Nvidia in the documentation.

To verify the ECC status I run the command below:
nvidia-smi -q
I disable ECC on all GPU’s by running the following command and reboot afterwards:
nvidia-smi -e 0
Finally I attach a PCI profile to a test VM and Power ON.
In a perfect world, this would have worked without flaw, but instead I got the following error: Could not initialize plugin ‘libnvidia-vgx.so’ for vGPU ‘nvidia_a40-1q’. Failed to start the virtual machine. Module DevicePowerOn power on failed.
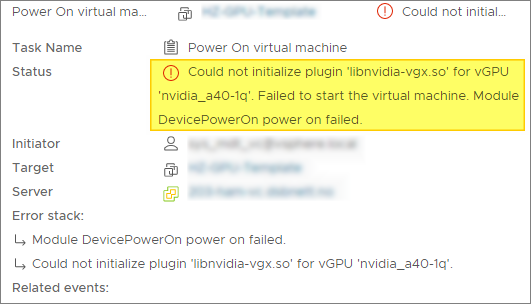
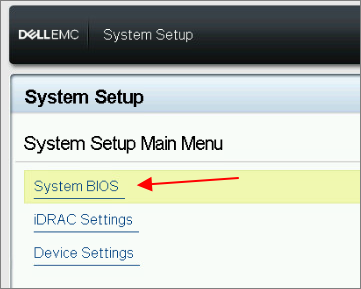
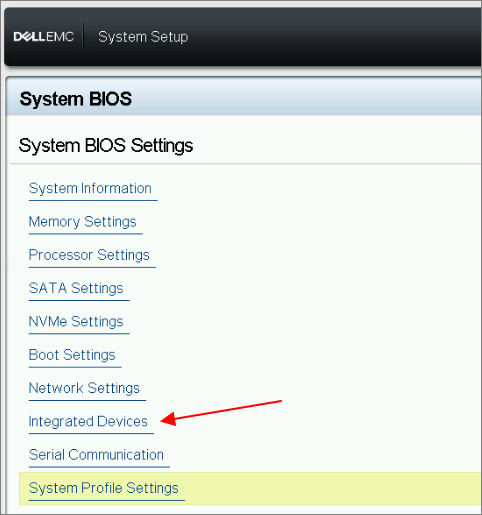
After a little googling, this turned out to be a BIOS setting that needed to be enable on the Dell PowerEdge R750 server. So I rebooted to BIOS and changed this config as follows.
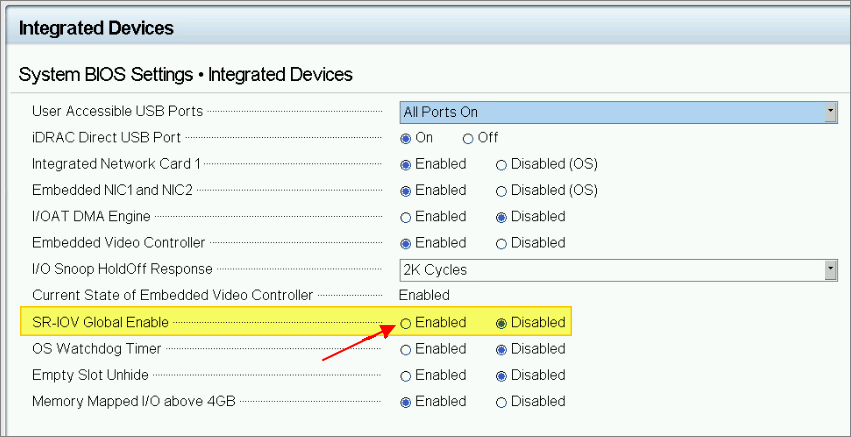
Once the above setting was activated my test VM started up as it should.
Deploy and configure License server appliance (Air-Gapped mode)
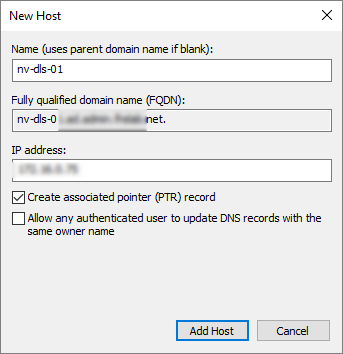
Next, I will show how to set up NVIDIA Licensing in an Air-Gapped environment. I start out by deploying the License server On-Premise. This is done in vSphere. Before I deploy the OVF template in vSphere, I create a static DNS entry for my license server in DNS, both forward and reverse.
I browse and select the NLS OVA file, Next…

I provide a name and folder location, Next…

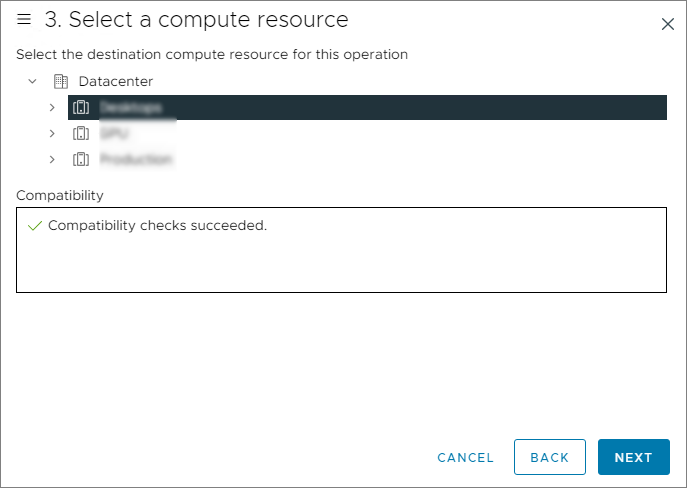
I select the compute source for the license server, Next…
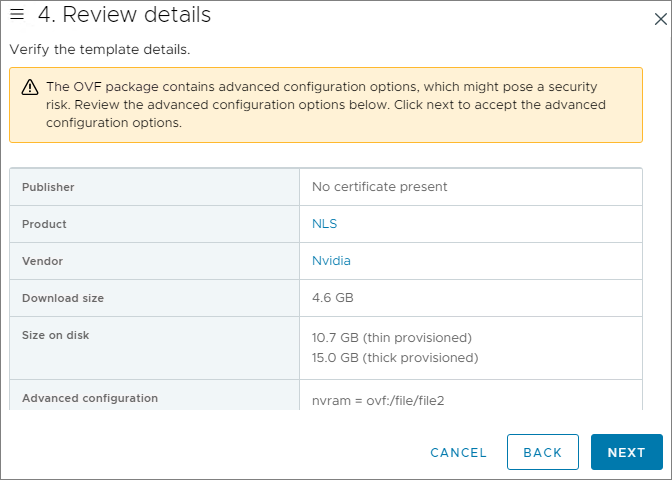
The details looks good, Next…
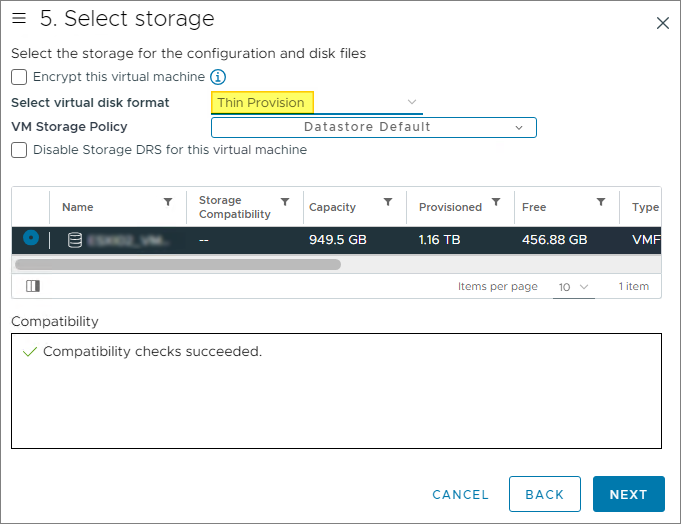
In the storage selection window, I pick a datastore and select Thin Provisioning for this set up, Next…
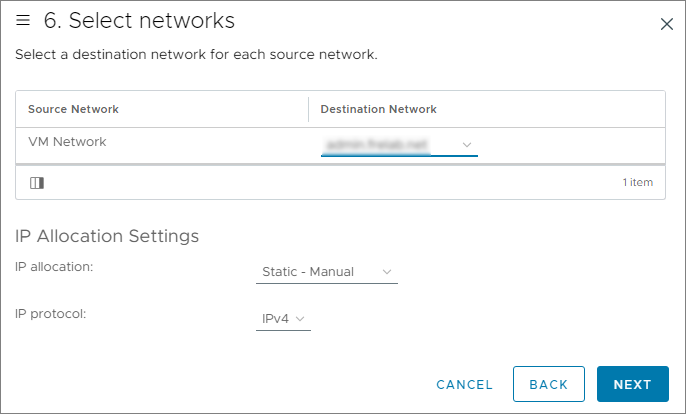
I select the correct port group for the license server, Next…
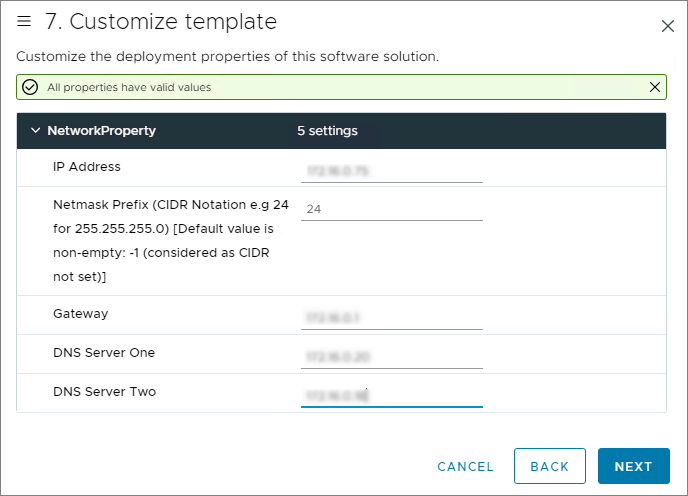
To customize the template, I provide the IP Address, Netmask Prefix, Gateway and DNS-information, Next…
As everything looks nice, I click Finish to initiate the License Server deployment. Once it is deployed, I power up the appliance.

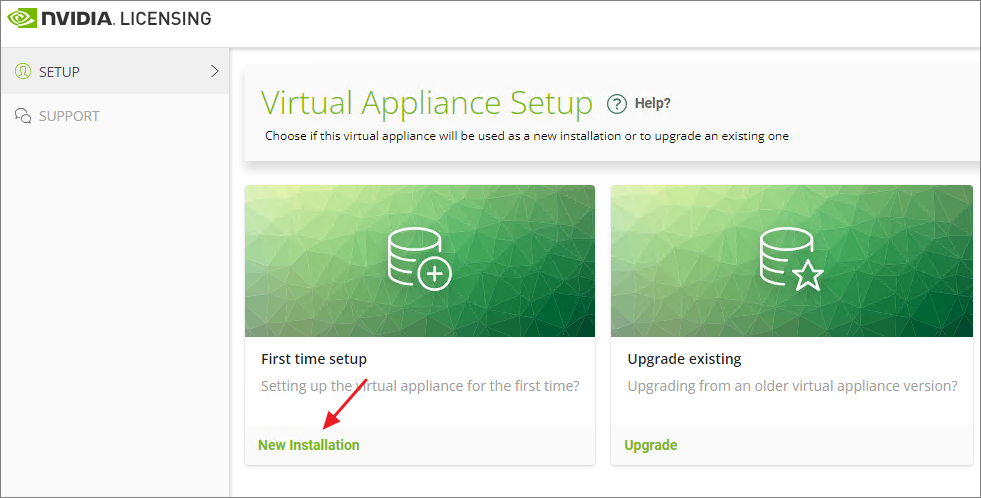
Once the license server is powered up I can do the Virtual Appliance Setup. I click New Installation…
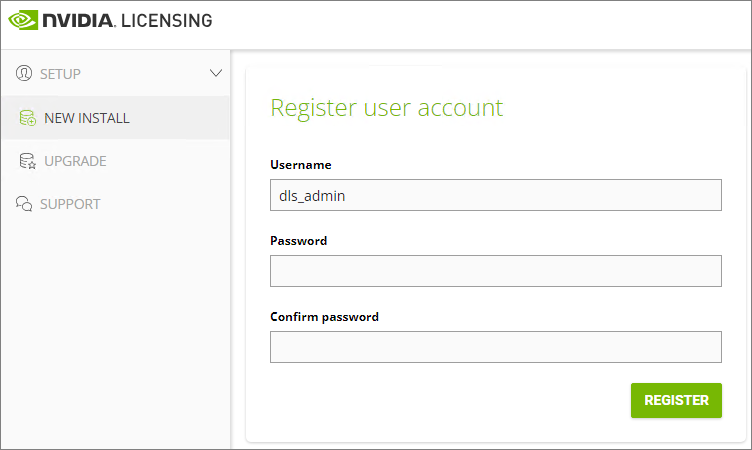
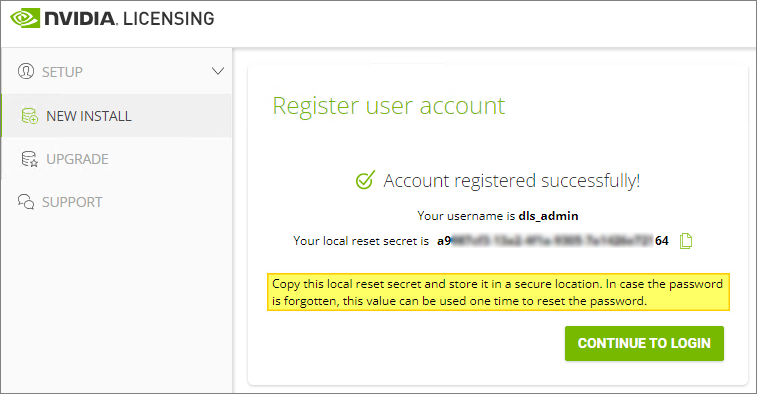
First, I configure a password for the dls_admin user, Register…
I backup the local secret string before i Continue to login…
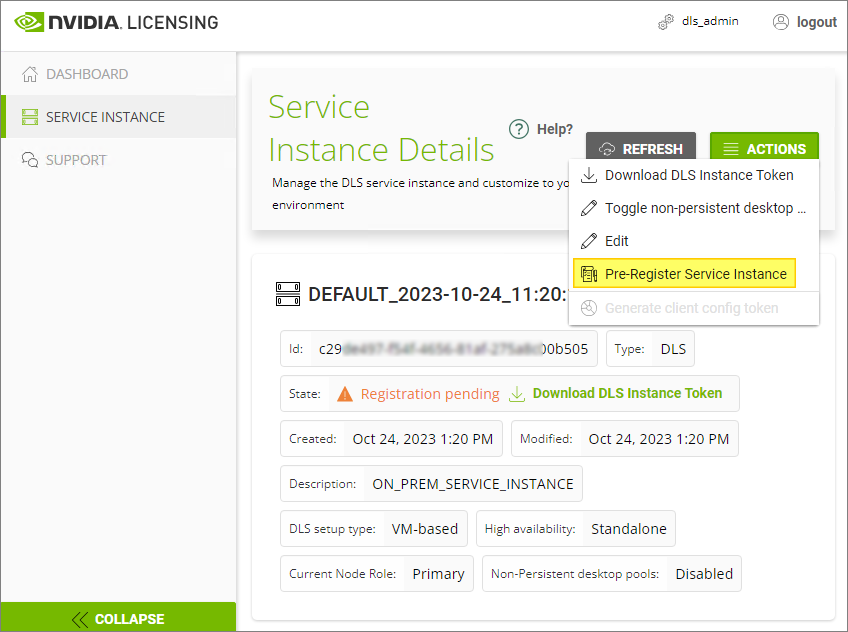
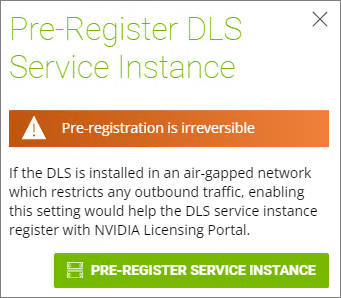
As this will be an air-gapped License Server, I select Service Instance on the left-hand menu, and click Pre-Register Service Instance from the Actions menu. This is an irreversible action and has to be confirmed to continue. I record the Service Instance ID for use below.
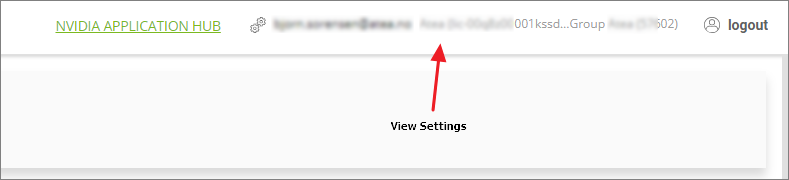
Now I need to register the License Server instance in the NVIDIA Application Hub. In the top right corner I click View Settings…
From the settings menu, I enable Alternate service instance registration under Organization level settings, Update Settings…

Under Service Instances menu on the left, I click Actions and Register DLS for air-gapped network…

I supply the Service Instance ID I recorded above, Name and Description, Register…

Next, I create a new license server, Create Server…

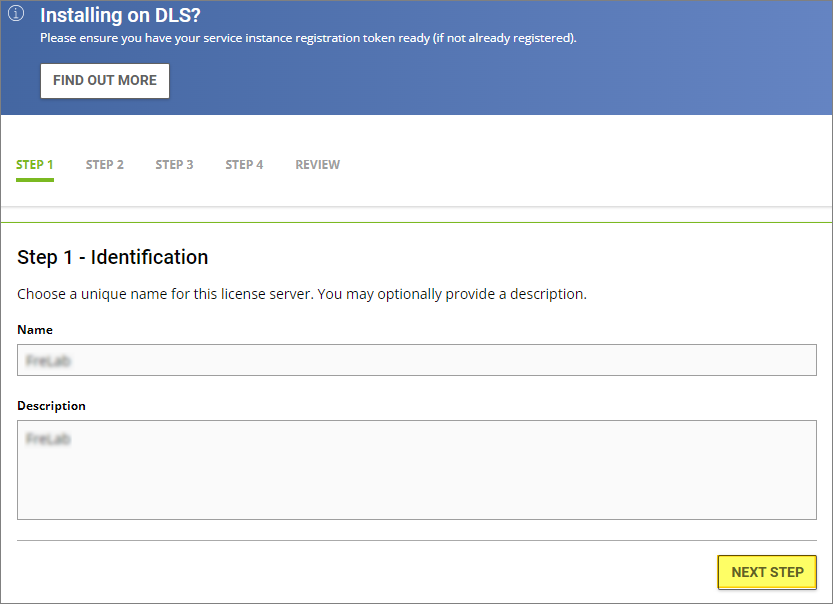
In Step 1 – Identification, I provide a Name and Description, Next Step…
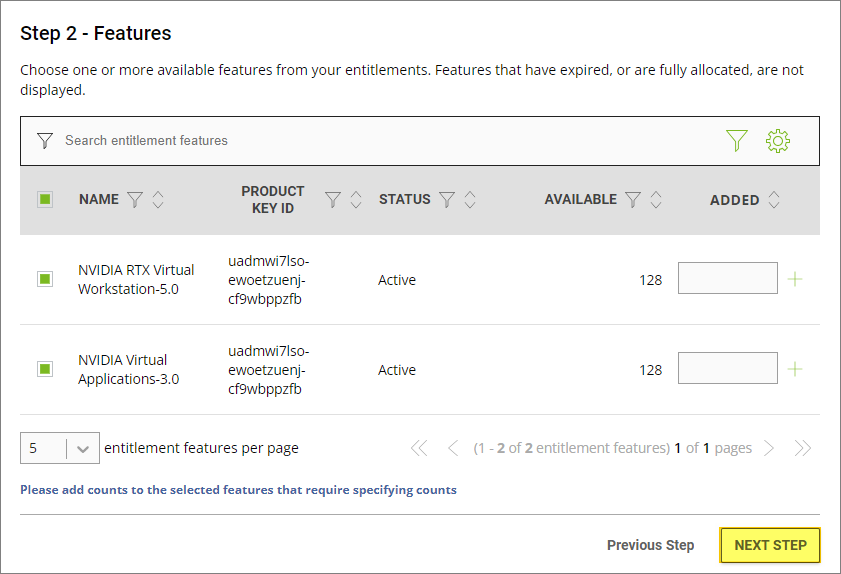
In Step 2 – Features, I entitle the features, Next Step…
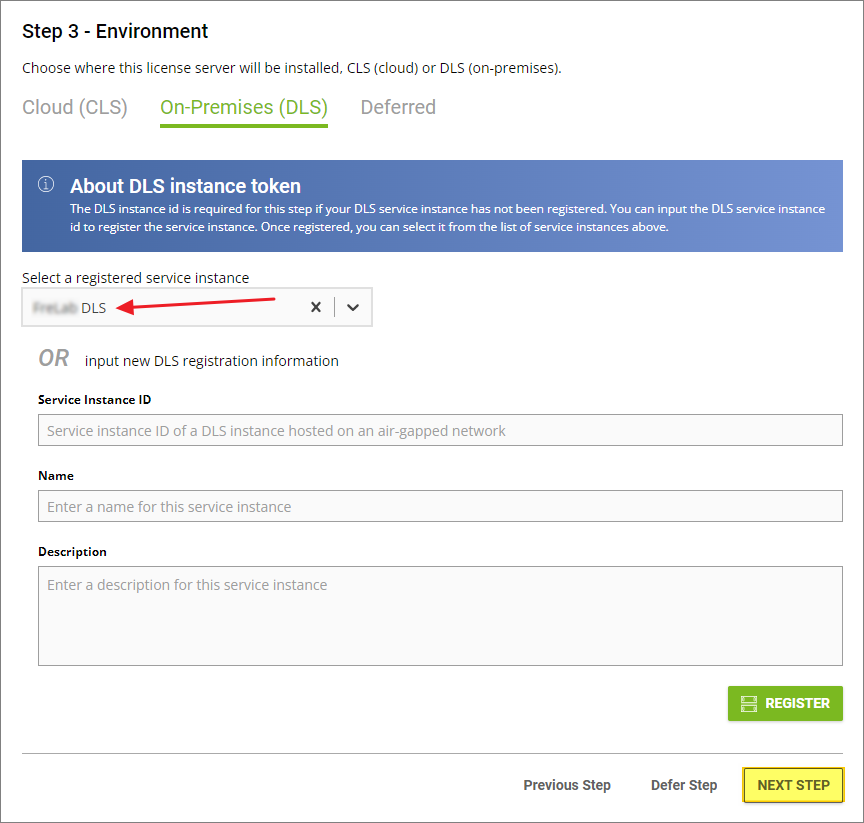
In Step 3 – Environment, I select On-Premises (DLS) and choose my Pre Registered service instance, Register…
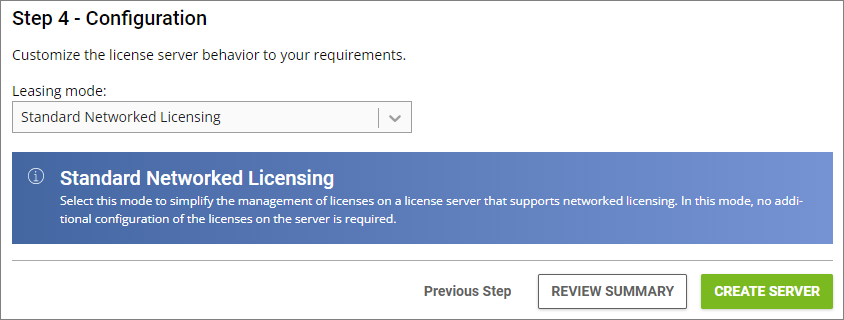
In Step 4 – Configuration, I select Standard Networked Licensing for the Leasing Mode, Create Server…
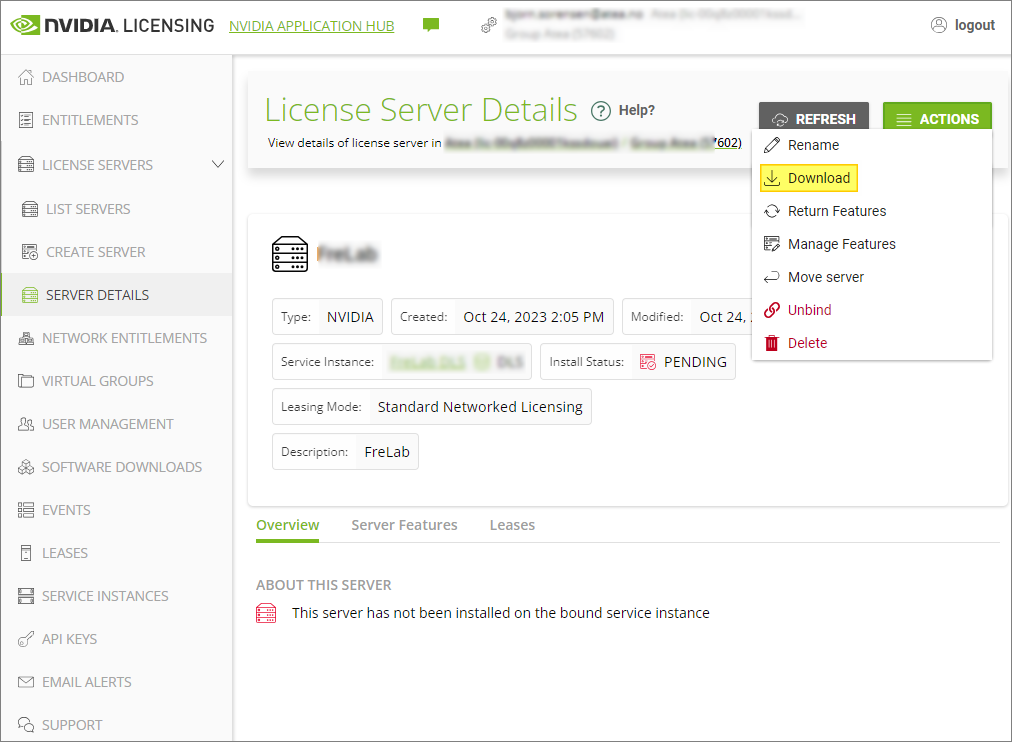
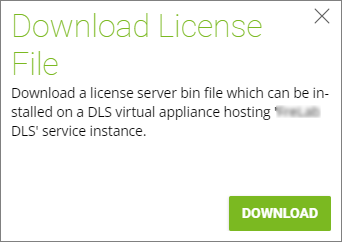
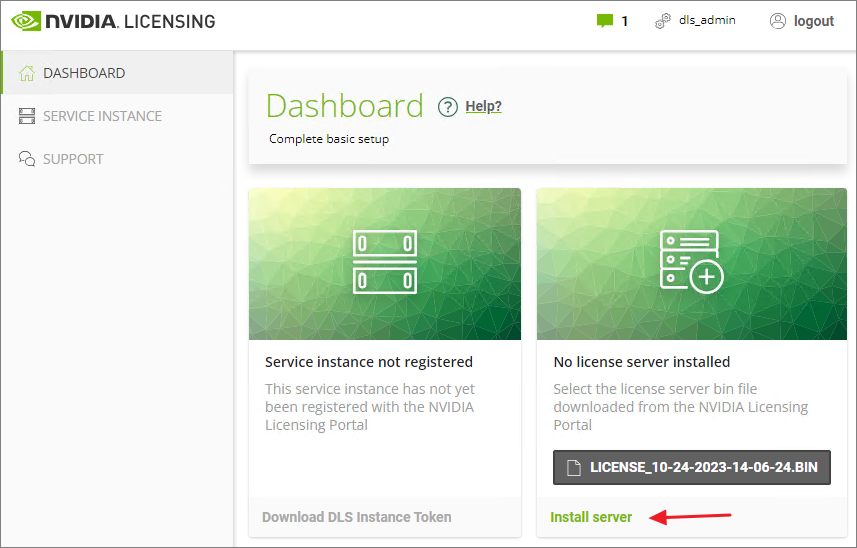
I can now download the license server bin file I need for my DLS Virtual Appliance On-Premise. From the Action menu, I click Download…
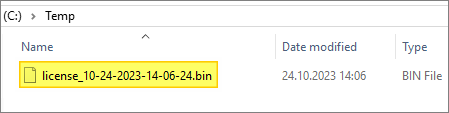
I transfer the bin file to my air-gapped environment
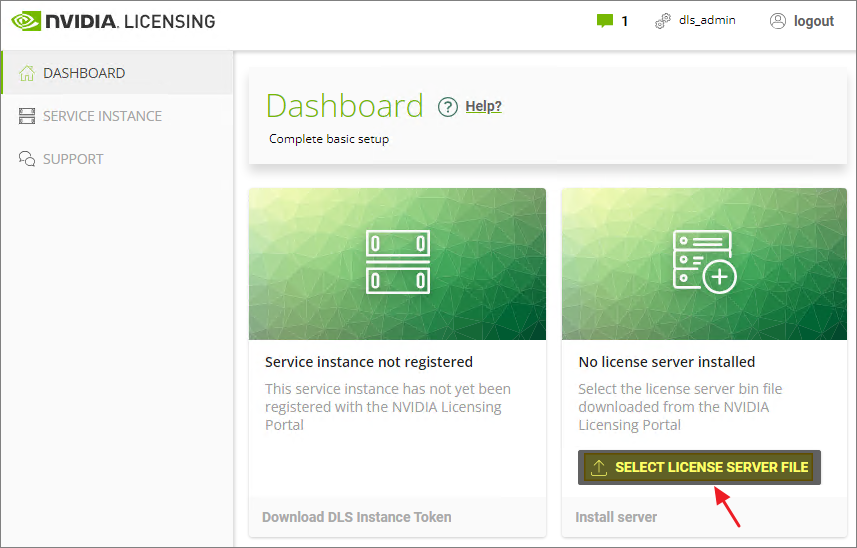
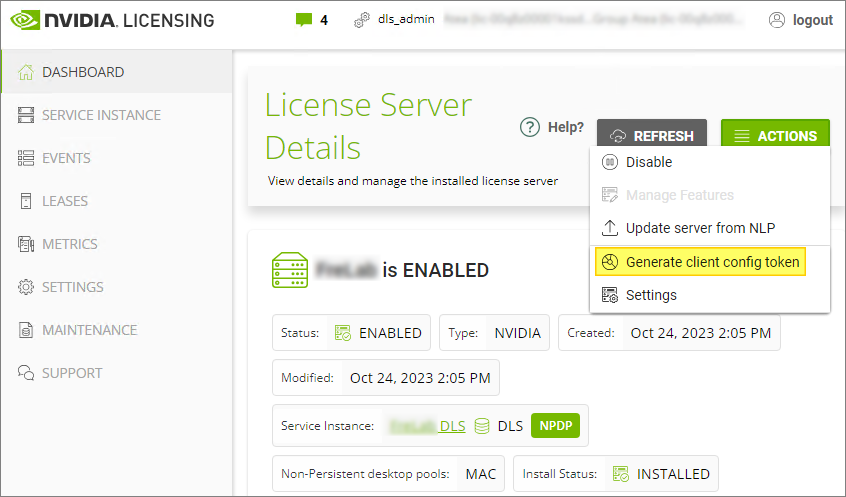
From the Dashboard of my License Server, I click Select License Server File and Install server…
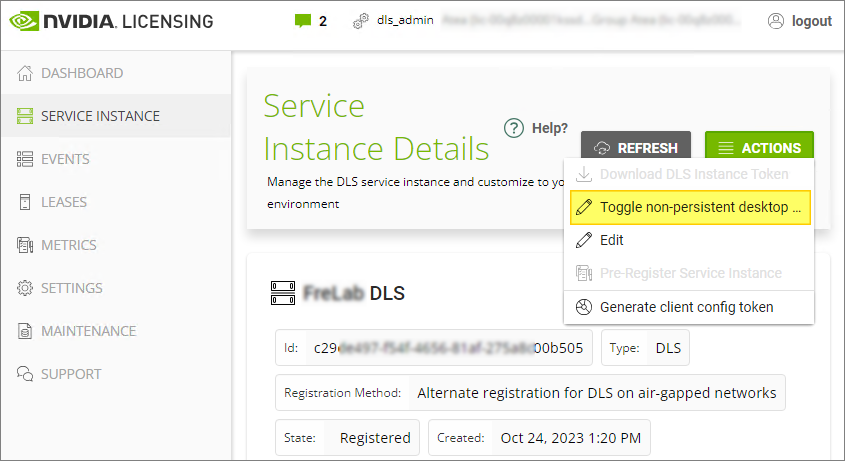
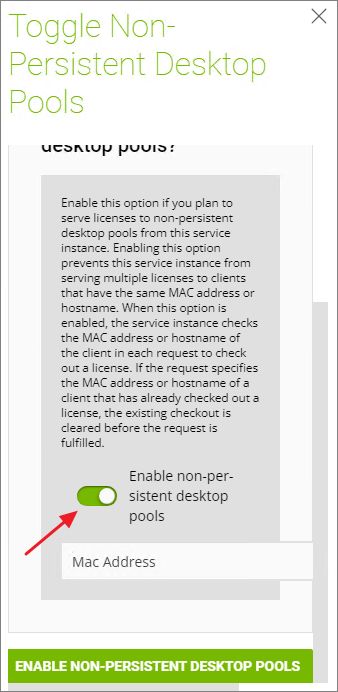
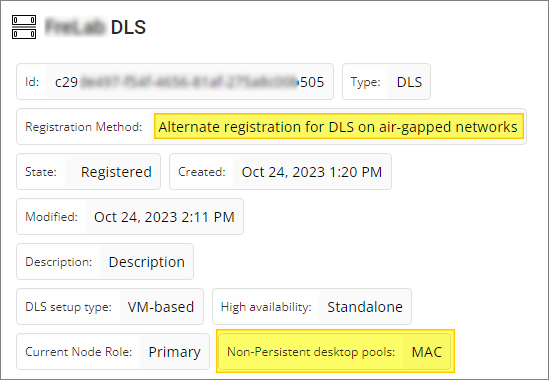
As this License Server will provide licenses to my VMware Horizon Instant-Clone desktop pools, I click Toggle non-persistent desktop from Actions under the Service Instance menu
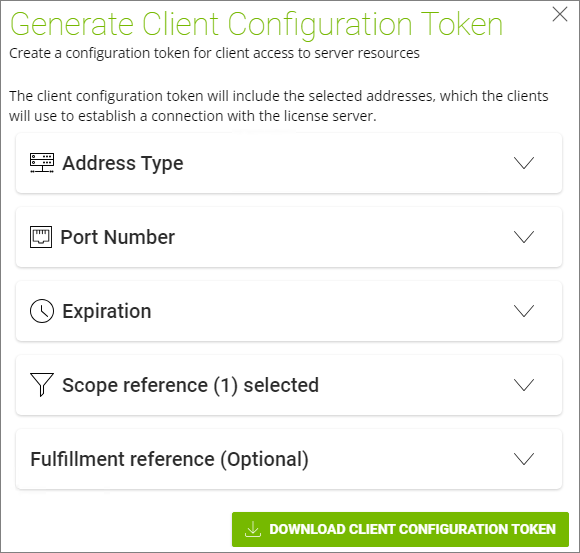
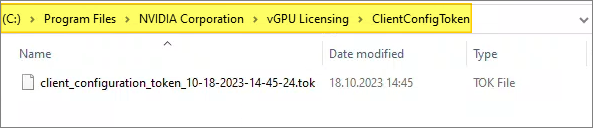
Finally, I download the Client Config Token file which I will deploy to my desktops using MDT, as described below
VM setup and Windows driver install
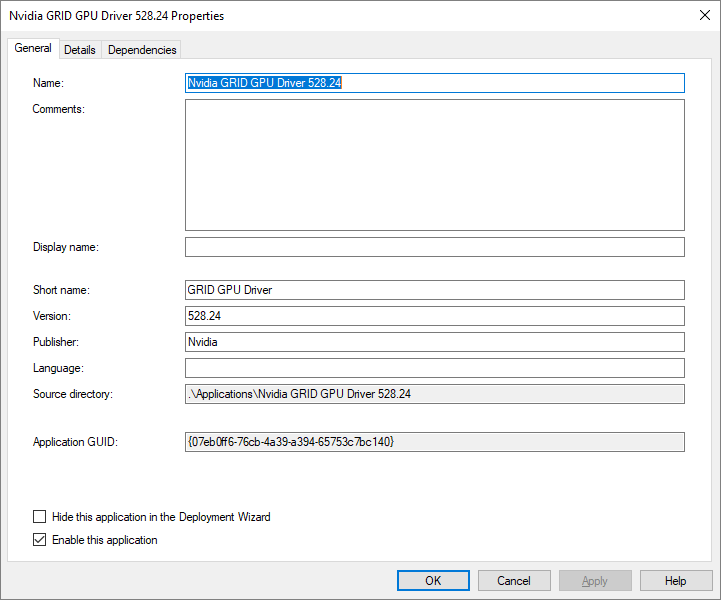
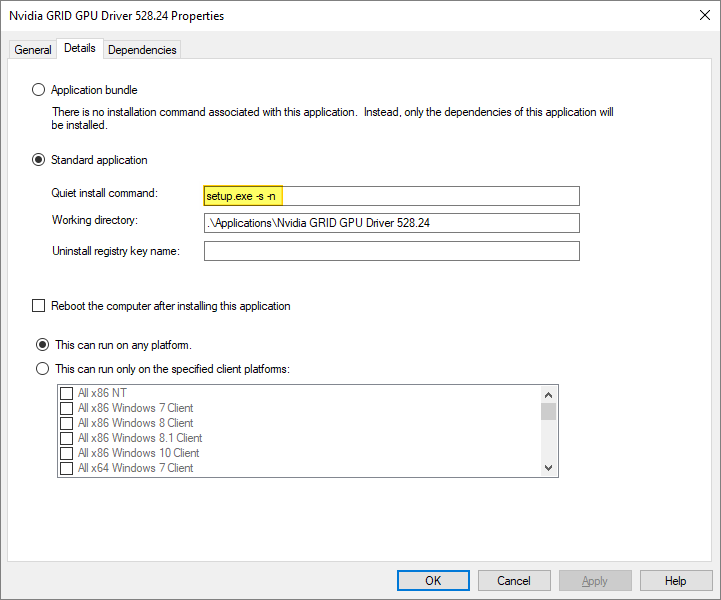
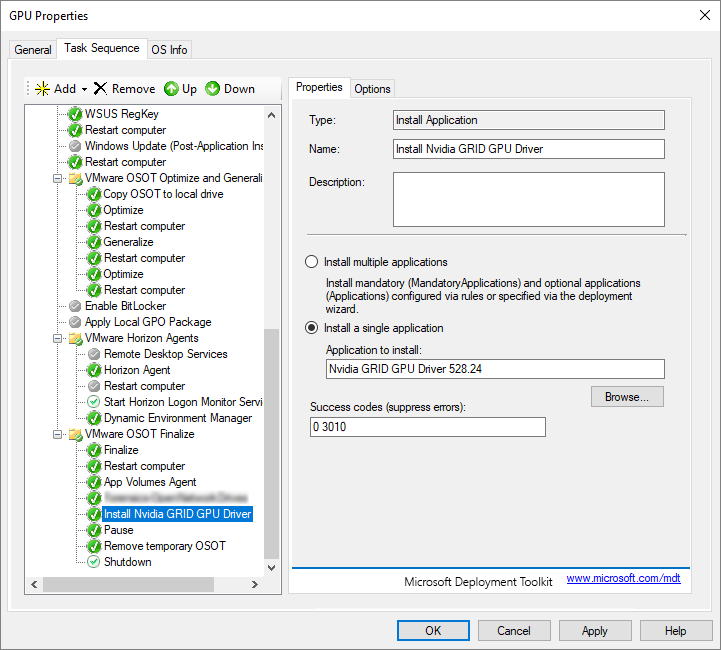
As I use MDT to create my Horizon Golden Images, as described here: VMware Horizon – Automating Template Creation & Maintenance, I add the NVIDIA Driver as an Application in MDT and create a step in the task sequence to install it.
To deploy the NVIDIA Client Config Token to the template, I first create a little batch file that create the necessary folder in the file-system. According to NVIDIA’s documentation: Virtual GPU Client Licensing User Guide this should be in the folder: “C:\Program Files\NVIDIA Corporation\vGPU Licensing\ClientConfigToken“. I place this script in the Scripts-folder under DeploymentShare.
cd\
cd "Program Files"
md "NVIDIA Corporation"
cd "NVIDIA Corporation"
md "vGPU Licensing"
cd "vGPU Licensing"
md "ClientConfigToken"
I add a step in the task-sequence to execute my batch file
cmd.exe /c %SCRIPTROOT%\NvGPUCliToken.bat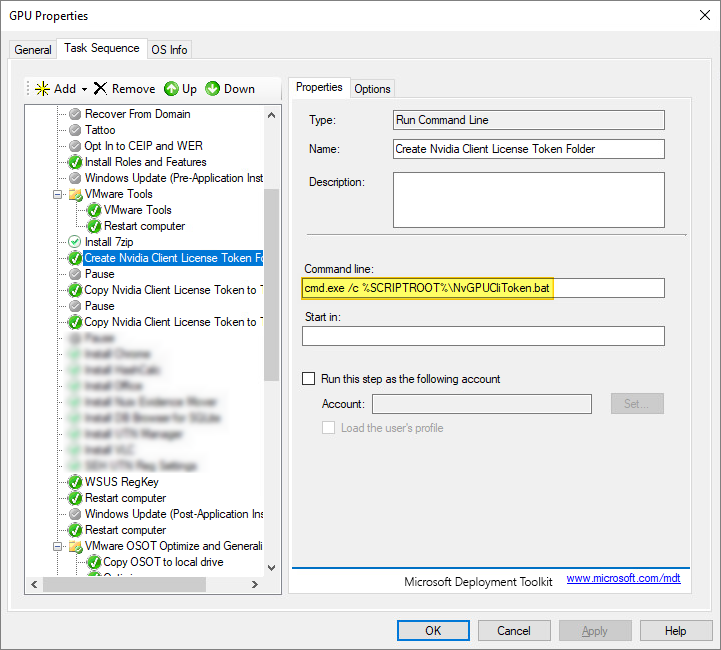
As I cannot use MDT to copy directly to the Program Files folder above, I first copy it to a temp-folder first, using the command below
xcopy /y /f "%DeployRoot%\VMware\Nvidia\ClientConfigToken\*" "%SystemDrive%\GPUTemp\"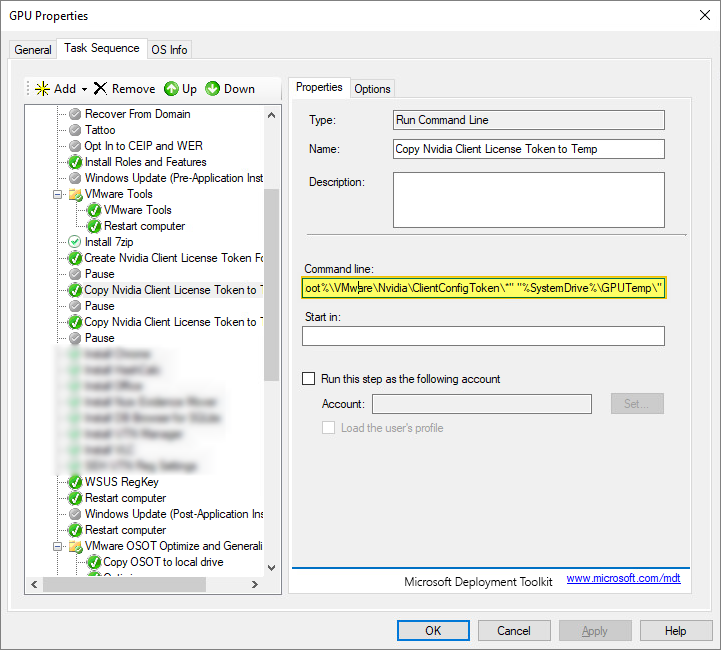
Finally I copy the token file to the correct folder location “C:\Program Files\NVIDIA Corporation\vGPU Licensing\ClientConfigToken” using the cmd below
xcopy /y /f "%SystemDrive%\GPUTemp\*" "%SystemDrive%\Program Files\NVIDIA Corporation\vGPU Licensing\ClientConfigToken\"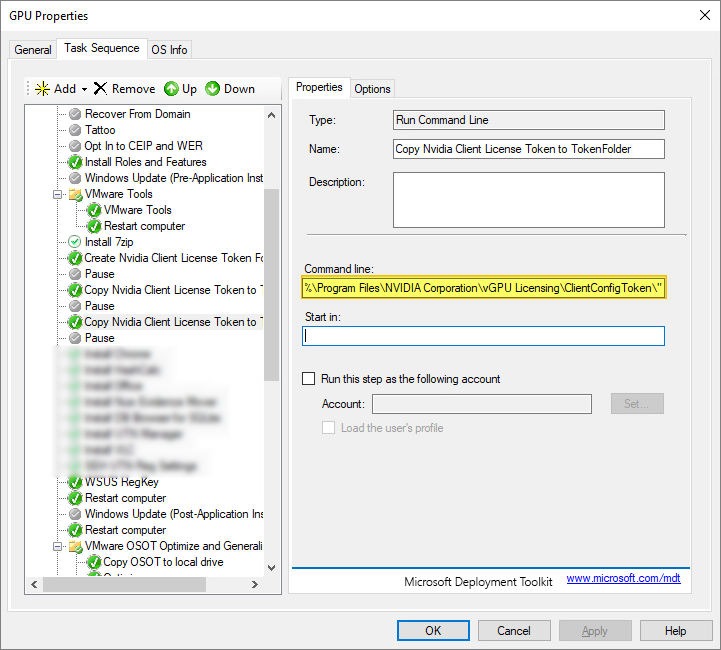
I also edit the Powershell-script and csv-file I use for automating the Horizon Template creation accordingly:
In the csv-file I add a coloumn for vGPU

At the en of PowerShell script I use to automate the vm-creation etc, I add the following which removes any existing GPU profiles from the VM and list available GPU Profiles from the ESXi server that allows me to select one for my template
$vGpuProfiles = $vmhost.ExtensionData.Config.SharedPassthruGpuTypes

$i = 0
foreach ($vGpuProfile in $vGpuProfiles)
{
	Write-Host "[$i] - $vGpuProfile"
	$i++
}
Write-Host "#############################"

do
{
	try
	{
		$validated = $true
		$max = $i -1
		[int]$vGpuSelectionInt = Read-Host -Prompt "Choose a profile from the list (between 0 - $max)"
	}
	catch {$validated = $false}
}
until (($vGpuSelectionInt -ge 0 -and $vGpuSelectionInt -le $max) -and $validated)
$vGpuSelection = $vGpuProfiles[$vGpuSelectionInt]
Write-Host "You selected:" $vGpuSelection -ForegroundColor Green

$vms = Get-VM -Name $templatename

foreach ($vm in $vms)
{

    $vGPUDevices = $vm.ExtensionData.Config.hardware.Device | Where { $_.backing.vgpu}
    	if ($vGPUDevices.Count -gt 0)
	{
		Write-Host "Remove existing vGPU configuration from VM:" $vm.Name -ForegroundColor Green
		foreach ($vGPUDevice in $vGPUDevices)
		{
			$controllerKey = $vGPUDevice.controllerKey
			$key = $vGPUDevice.Key
			$unitNumber = $vGPUDevice.UnitNumber
			$device = $vGPUDevice.device
			$summary = $vGPUDevice.Summary

			$spec = New-Object VMware.Vim.VirtualMachineConfigSpec
			$spec.deviceChange = New-Object VMware.Vim.VirtualDeviceConfigSpec[] (1)
			$spec.deviceChange[0] = New-Object VMware.Vim.VirtualDeviceConfigSpec
			$spec.deviceChange[0].operation = 'remove'
			$spec.deviceChange[0].device = New-Object VMware.Vim.VirtualPCIPassthrough
			$spec.deviceChange[0].device.controllerKey = $controllerKey
			$spec.deviceChange[0].device.unitNumber = $unitNumber
			$spec.deviceChange[0].device.deviceInfo = New-Object VMware.Vim.Description
			$spec.deviceChange[0].device.deviceInfo.summary = $summary
			$spec.deviceChange[0].device.deviceInfo.label = $device
			$spec.deviceChange[0].device.key = $key
			$_this = $VM  | Get-View
			$nulloutput = $_this.ReconfigVM_Task($spec)
		}
	}

Write-Host "Adding new vGPU configuration from VM:" $vm.Name -ForegroundColor Green
    $vmSpec = New-Object VMware.Vim.VirtualMachineConfigSpec
    $vmSpec.deviceChange = New-Object VMware.Vim.VirtualDeviceConfigSpec[] (1)
    $vmSpec.deviceChange[0] = New-Object VMware.Vim.VirtualDeviceConfigSpec
    $vmSpec.deviceChange[0].operation = 'add'
    $vmSpec.deviceChange[0].device = New-Object VMware.Vim.VirtualPCIPassthrough
    $vmSpec.deviceChange[0].device.deviceInfo = New-Object VMware.Vim.Description
    $vmSpec.deviceChange[0].device.deviceInfo.summary = ''
    $vmSpec.deviceChange[0].device.deviceInfo.label = 'New PCI device'
    $vmSpec.deviceChange[0].device.backing = New-Object VMware.Vim.VirtualPCIPassthroughVmiopBackingInfo
    $vmSpec.deviceChange[0].device.backing.vgpu = "$vGpuSelection"
    $vmSpec.memoryReservationLockedToMax = $true

    $vmobj = $vm | Get-View

	$reconfig = $vmobj.ReconfigVM_Task($vmSpec)
    if ($reconfig) {
        $changedVm = Get-VM $vm
        $vGPUDevice = $changedVm.ExtensionData.Config.hardware.Device | Where { $_.backing.vgpu}
       }
}
VMware Horizon Desktop Pool configuration
I make sure to set NVIDIA GRID VGPU as 3D Renderer under Desktop Pools Settings in Horizon Administrator Console.

Test and verification
To verify that the Horizon desktop actually get’s a license I log in to a GPU-enable desktop pool and first check that i get the client configuration token from the MDT Task sequence.
Next, I run the following command to check that the desktop receives a lease from the licence server
nvidia-smi -q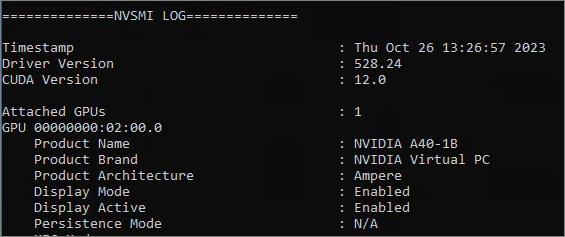

Finally, I log into the License server and verify that the lease is registered.

VMware Documentation:
- Deploying Hardware-Accelerated Graphics with VMware Horizon
- Installing and configuring the NVIDIA VIB on ESXi (2033434)
- Using Automation to Create Optimized Windows Images for VMware Horizon VMs
Nvidia Documentation:
- Installing and configuring the NVIDIA vGPU Manager VIB
- SILENT INSTALL OF THE GRID VM GRAPHICS DRIVER FOR WINDOWS
Big Thanks to:
- Frank Denneman’s: COULD NOT INITIALIZE PLUGIN ‘LIBNVIDIA-VGX.SO – CHECK SR-IOV IN THE BIOS
- Ryan Ververs-Bijkerk’s: Change VMware vGPU settings with PowerShell
VMware Horizon planning, deployment etc.
Official VMware Horizon 8 Documentation
Disclaimer: Every tips/tricks/posting I have published here, is tried and tested in different it-solutions. It is not guaranteed to work everywhere, but is meant as a tip for other users out there. Remember, Google is your friend and don’t be afraid to steal with pride! Feel free to comment below as needed.

Why not use the CopyFiles.vbs script to copy the token to the correct directory? I’ve routinely been using it to copy configuration files post application install. If I recall correctly I found it in a post by Michael Petersen of Coretech.dk (though he’s now long since passed away)
LikeLike