
Release date: June 4th 2021
Welcome to my VMware Horizon series. With the release of VMware Horizon 8, the possibility to use Linux multi session with Ubuntu and Red Hat was presented. Release Notes for VMware Horizon Version 2006. This is a very cool new feature that is very helpful in many use cases. Previously, this functionality demanded MS RDS with expensive licensing, but is now available with Linux.
In this session I will venture into the “somewhat unknown”, VMware Horizon 8 Multi-session Linux desktops and apps. As I’m in no sense a Linux-expert, this has been planned for quite awhile. VMware has a great guide to setting up Linux as a Horizon desktop, but I find it lacking in some areas, although this is most likely due to the fact that there are different ways of using the Linux-specific technology to achieve the same goals. VMware’s official documentation about setting up Linux with in VMware Horizon is here: Setting Up Linux Published Desktops and Applications for Multi-Session Use.

I was careful to check out the system requirements before starting this session, and therefore I’ll be using Ubuntu 20.04. Beforehand, I have verified that this is supported. For anyone that are venturing down the path of setting up Linux in a VMware Horizon environment, I would recommend reading the documentation carefully up front.
To complete this session, I have identified the following tasks that has to be completed.
- Deploy Virtual Machine
- Configure Virtual Machine
- Install Operating System
- Install Open VM Tools
- Configure Operating System
- USB Redirection
- Prepare Ubuntu for VMware Horizon
- Integrate Linux with MS Active Directory
- Create Desktop Farm
- Create Desktop Pool
- Create Desktop Pool Global Entitlement
- Test Desktop Pool
- Create Application Farm
- Create Application Pool
- Create Application Pool Global Entitlement
- Test Application Pool
Deploy Virtual Machine
Deploy Virtual Machine
I will be creating two identical Virtual machines for this exercise, one template for the Desktop Farm and one for the Application Farm. Before I start building my VM’s, I read the documentation VMware have created on this topic: Create a Virtual Machine and Install Linux
Below are some of the prerequisites. I will be using Ubuntu 20.04 in a virtual machine with good working DNS in my environment and there are more than enough ports in my port groups to support my Instant Clone pools. So, for these prerequisites, I check all the boxes.

Furthermore, VMware have the following prerequisite about the communication between the Linux VM’s and the Connection Server, this isn’t a problem in my set up.

Lastly, as this will be a multi-user environment, it is important to validate the sizing of vCpu and vMem for the VM’s, as described by VMware below

I start by creating the Virtual Machines that are going to be the “Golden Images” for the Instant Clone pools. I login to VMware vSphere, select the cluster and choose “New Virtual Machine”, Next…

I give the Virtual machine a name, and select the location where the VM should to be placed, Next…

I select FreLab Cluster as my compute resource, Next…

Select the Storage on where the VM will be placed, in my case my Datastore Cluster, Next…

Select the compatibility. I have chosen to use the “ESXi 7.0 U1 and later”, Next…

I select Linux as Guest OS Family and Ubuntu Linux (64-bit) as OS Version, Next…

Customize the hardware, in my case I give it 8 vCpu, 40 GB of vMem and 40 GB thin provisioned Hard Disk, Next…

Under the second tab VM Options, I disable logging, select Boot Options and enable force BIOS setup. With this option enabled, I go straight into the BIOS of the VM after powering it on.


Finally, I check the installation summary and click Finish…

Configure Virtual Machine
Configure Virtual Machine
When the VM is created, I first boot into BIOS and make the following modifications.
I launch the Web or Remote Console. In BIOS I disable all features that are unnecessary. In the Main-tab, all Diskette stations are disabled, which is OK.Next, I open the Advanced–tab.

Within the advanced section, select I/O Device Configuration. I don’t need any of the I/O Devices, so we disabled them all. Press ESC to return to the BIOS main screen. Select Boot-Tab


I change the boot-order as follows. When done I press ESC and F10. Save and exit


With the BIOS modifications done, I power off the VM, attach my Ubuntu-ISO and power on the virtual machine

Install Operating System
Install Operating System
It is now time to install the Operating System. The ISO with the software is already attached to the VM and connected. The installation screen from Ubuntu is shown, I select “Install Ubuntu“, Enter…

The first thing I do is to select the language to be used during installation, Continue…

I will be doing a normal installation and I will download updates while installing Ubuntu, Continue…

I select “Erase Disk and install Ubuntu”, Install Now and Continue…


I select my location, Continue…

Next, I provide my credentials and computer name, Continue…

The installation of Ubuntu Desktop 20.04 starts…


I click “Restart Now” once the installation is done

As I mentioned to begin with, I’m no Linux expert. Therefore I prefer to take some snapshots during the setup of Linux, which gives me the opportunity to roll back if I run into problems further into the set up. I will document at what point I take the snapshots below. All snapshots are taken with the VM shutdown.
SNAPSHOT: Base-installation complete
Install Open VM Tools
Install Open VM Tools
Before I start preparing my VM for VMware Horizon, I verify that the prerequisites are met as described by VMware here: Prepare a Linux Machine for Remote Desktop Deployment

Next, I power on the VM and proceed with installing Open VM Tools. I launch Terminal and install Open VM Tools by running the following command:
sudo apt-get install -y open-vm-toolsOnce Open VM Tools is installed, I do a reboot to verify that VMware Tools is running.
Before I continue I install openssh to be able to configure using SSH
sudo apt update
sudo apt install openssh-server
Finally, I shut down the VM and take a snapshot before I proceed.
SNAPSHOT: OpenVMTools Installed
Configure Operating System
Configure Operating System
Before I continue, I check if there are any updates that I will need to install before I continue, I restart as needed.


After update is complete, Disable Automatic Updates

SNAPSHOT: Ubuntu-update complete
USB Redirection
USB Redirection
As I don’t plan to be using USB redirection, this point don’t apply to me. BUT, for any of you who reads this post, and plan to use USB redirection, be aware that the VHCI Driver for USB redirection has to be installed before the VMware Horizon for Linux agent. A detailed description of the VHCI driver install can be found in VMware’s documentation here: System Requirements For Horizon Agent for Linux

Prepare Ubuntu for VMware Horizon
Prepare Ubuntu for VMware Horizon
Prior to downloading and installing VMware Horizon Agent, I must install the dependency packages as documented by VMware here: Install Dependency Packages for Horizon Agent
sudo apt-get install python python-dbus python-gobjectI next install the required “liburiparser1” software package as this is a requirement for the VMware Horizon Linux Agent on Ubuntu 20.04. This I do by running the following command:
sudo apt-get install liburiparser1Now I can download the correct version of VMware Horizon Agent for Linux from My VMware

I extract and I launch installation of the Horizon Agent
sudo ./install_viewagent.sh --multiple-sessionDuring the installation there are several choices that can be made, but I choose to leave all settings default and reboot at the end.
This is the correct point during setup of the Golden Image to make adjustments to the VMware Horizon Agent settings. These settings and options can be edited in the following two files, /etc/vmware/config and /etc/vmware/viewagent-custom.conf For in dept info about these settings, check out the documentation here: Setting Options in Configuration Files on a Linux Desktop
SNAPSHOT: Hz-agent-installation complete
Integrate Linux with MS Active Directory
Integrate Linux with MS Active Directory
Integrating the Ubuntu VM with MS AD is a multi-step procedure, when using PBIS. Before I start, I install OpenSSH using the following command:
sudo apt install openssh-server -yI can now use Putty to do the rest of the configuration.
I proceed with installing PBIS using the following commands:
sudo wget -O - http://repo.pbis.beyondtrust.com/apt/RPM-GPG-KEY-pbis|sudo apt-key add -
sudo wget -O /etc/apt/sources.list.d/pbiso.list http://repo.pbis.beyondtrust.com/apt/pbiso.list
sudo apt-get update
sudo apt-get install pbis-open
SNAPSHOT: PBIS-installation complete
Next, I configure PBIS to join this computer account to my Active Directory. The FQDN of my AD is “ad.admin.frelab.net” and the NETBIOS-name is “AD”. For this setup I will be using my “administrator” user from AD. I configure PBIS by running the following commands:
sudo /opt/pbis/bin/domainjoin-cli join ad.admin.frelab.net administrator
sudo reboot now

sudo /opt/pbis/bin/config AssumeDefaultDomain true
sudo /opt/pbis/bin/config UserDomainPrefix AD
sudo /opt/pbis/bin/config LoginShellTemplate /bin/bash
sudo /opt/pbis/bin/config HomeDirTemplate %H/%U
sudo /opt/pbis/bin/config RequireMembershipOf "AD\\domain^users"
sudo reboot now
After rebooting the system and logging back in again, I verify that PBIS is configured correctly by issuing the following commands:
sudo pbis status
sudo /opt/pbis/bin/lwsm list
Once I’m satisfied that PBIS is working correctly, I check to see if I can log in to my Linux desktop as an active directory user, hztest01@ad.admin.frelab.net, by entering the following command:
su hztest01@ad.admin.frelab.netSNAPSHOT: PBIS-config complete
Next, I will give the Domain Users permissions so that members can execute commands as root for testing. I edit the /etc/sudoers file and add a line as shown below:
sudo nano /etc/sudoers

Add the following line:
%AD^Domain^Users   ALL=(ALL) ALL,!ROOTONLY
Finally, I need to edit the following files to change some variables within them:
sudo nano /etc/pam.d/common-session

Add the following line:
session [success=ok default=ignore]     pam_lsass.so
To inform the VMware Horizon Agent that the Linux VM is domain joined using PBIS, I edit the /etc/vmware/viewagent-custom.conf» file by running the following command and add the following value: OfflineJoinDomain=pbis
sudo nano /etc/vmware/viewagent-custom.conf

Add the following line:
OfflineJoinDomain=pbis
I can now reboot the VM, shutdown and create a snapshot to be used during the Desktop and App Farm creation below.
Create Desktop Farm
Create Desktop Farm
Before I login to VMware Horizon Admin Console and start the Add Farm Pool Wizard, I acknowledge the prerequisites for Desktop Farm creation. For this session it will be An Automated Desktop Pool.

I will be creating an Automated Instant Clone farm to host my Desktop Pool. Inside VMware Horizon Administrator, I click Add to launch the «Add Farm» wizard

In this example I will be creating an “Automated Farm“, Next…

This automated farm will be using Instant Clones from my vCenter

I don’t use VMware VSAN, Next…

I provide the identification and display settings etc, Next…

In the Load Balancing section, I enter the proper Threshold values, see the documentation for more info, Next…

In the Provisioning Settings, I enter Virtual Machine naming patter and size, Next…

In the vCenter Settings section, I point to the Golden Image I created for the Desktop Farm, snapshot and additional vCenter settings, Next…

Under Guest Customization, I choose the Domain and Active Directory settings, Next…

I complete the New Desktop Farm wizard, Submit…

Once the provisioning is done I can verify that I have two Ubuntu 20.04 Instant Clones ready in my farm to host the Desktop Pool I will be creating below.

Create Desktop Pool
Create Desktop Pool
I login to VMware Horizon Admin Console and click Add to create an RDS Desktop Pool…


I provide the ID and Display Name, Next…

In Desktop Pool Settings, I adjust the settings to my liking, Next…

I will be using the RDS farm I created above for this Desktop Pool, Next…

As I will be using Global Entitlement for this Desktop Pool, in the section below, I wont do any Entitlement when adding this pool. Happy with my decisions selected above, I hit Submit and proceed.

Create Desktop Pool Global Entitlement
Create Desktop Pool Global Entitlement
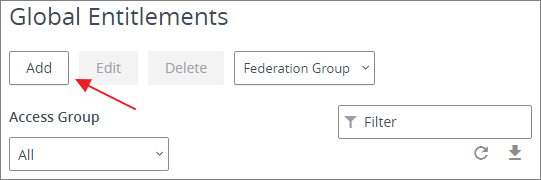
From the Inventory menu, I select Global Entitlements and click Add to launch the “Add Global Entitlements-wizard”

In the next screen we have the option to either create a Desktop or an Application Entitlement. I select Desktop Entitlement for this session.

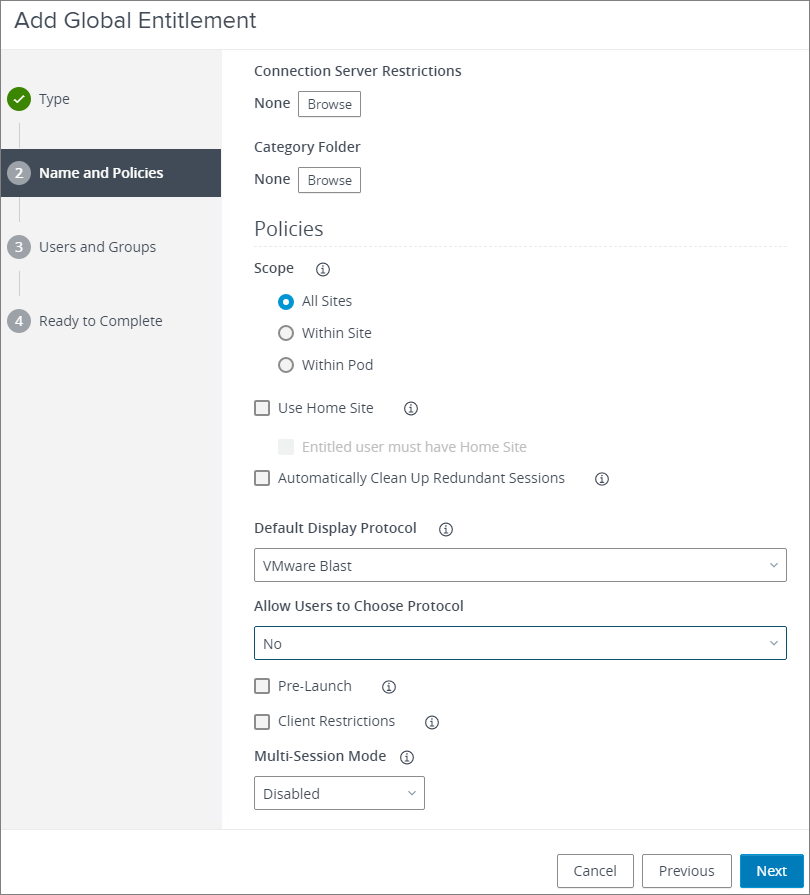
As there are many different ways to configure a Global Desktop Entitlement, I have done a walk-through below which shows how I configured my entitlement.


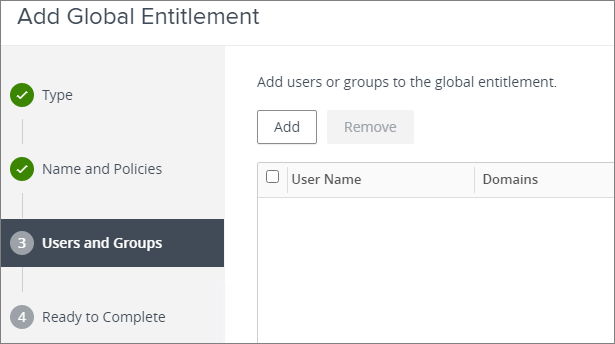
Next, I add the user group I have deemed worthy of this entitlement.

Having finished all my settings for this Global Entitlement, I click Finish…

I now have myself a Global Entitlement named “Ubuntu 2004 RDS”, it’s now time to add the desktop pool to this entitlement. To do this I select the entitlement.

From the Local Pools tab I click “Add” and select the “Ubuntu_2004_RDS” desktop pool.


Test Desktop Pool
Test Desktop Pool
When I launch my VMware Horizon Client I can see that I have a the Ubuntu 20.04 desktop available for my test-user. I launch this to verify that I can log in using SSO.

The desktop is now ready to be used as shown below.

In VMware Horizon Administrator I verify that I have an active session in my RDS Desktop Pool.

Create App Farm
Create Application Farm
I will be creating an Automated Instant Clone farm to host my application Pools. Inside VMware Horizon Administrator, I click Add to launch the Farm Creation wizard.

As with the Desktop Farm above, I will be creating an “Automated Farm“, using Instant Clones from my vCenter


I don’t use VMware VSAN, Next…

I provide the identification and display settings etc, Next…

IIn the Load Balancing section, I enter the proper Threshold values, see the documentation for more info, Next…

In the Provisioning Settings, I enter Virtual Machine naming patter and size, Next…

In the vCenter Settings section, I point to the Golden Image I created for this Application Farm, snapshot and additional vCenter settings, Next…

Under Guest Customization, I choose the Domain and Active Directory settings, Next…

I complete the New Application Farm wizard, Submit…

Once the provisioning is done, I can verify that I have two Ubuntu 20.04 Instant Clones ready in my farm to host the Application Pools I will be creating below.

Create Application Pool
Create Application Pool
Before I start the process of creating an Application Pool, I observe the prerequisites below.
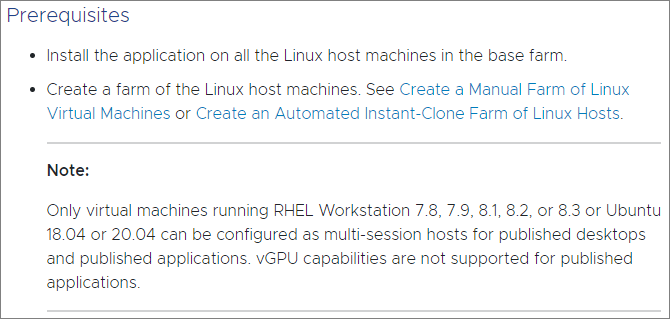
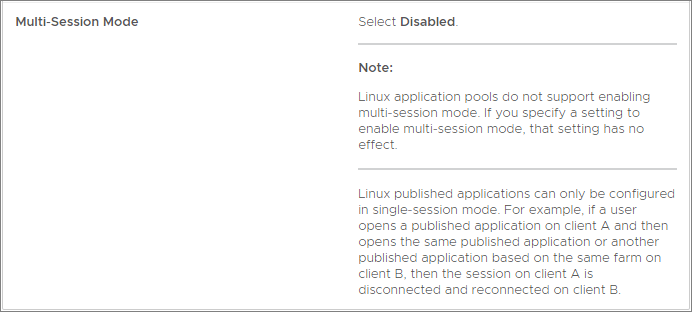
Also, note the fact that Multi-session in Linux Application Pools isn’t supported
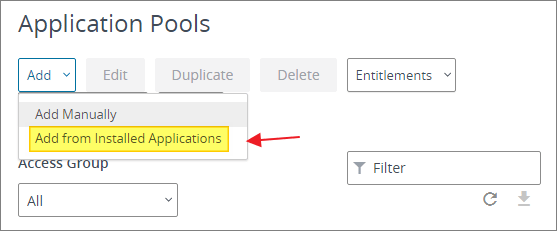
In VMware Horizon Administrator, I click “Add from Installed Application” from the Application Pools Menu
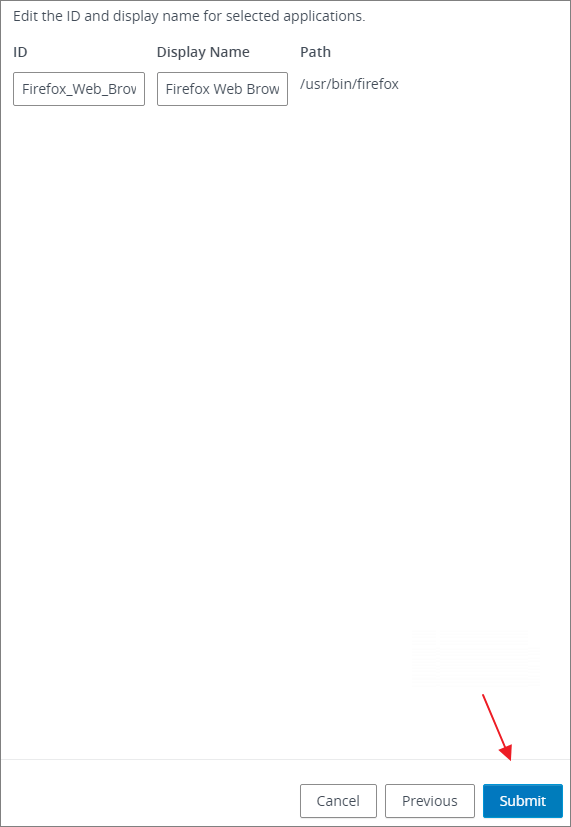
The Application Pool type for this session will be RDS Farm. I select the “Ubuntu_2004_AppFarm” I created above and now get a list of installed applications, from which I select “Firefox Web Browser”
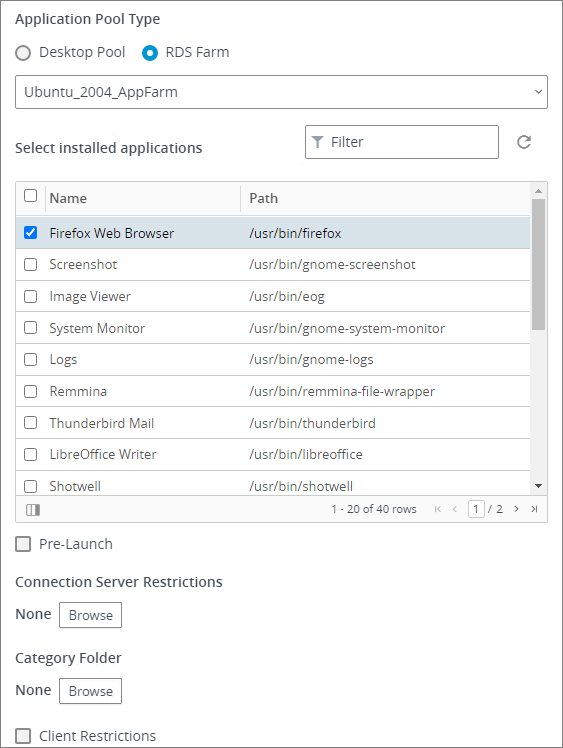
I edit the ID and Display Name, Submit…
Create Application Pool Global Entitlement
Create Application Pool Global Entitlement
I will now create a Global Entitlement to my Application Pool. This is very similar to the entitlement I created for my RDS Desktop Pool above. From the Inventory menu, I select Global Entitlements and click Add to launch the “Add Global Entitlements-wizard”
In the next screen we have the option to either create a Desktop or an Application Entitlement. I Select Application Entitlement for this session.

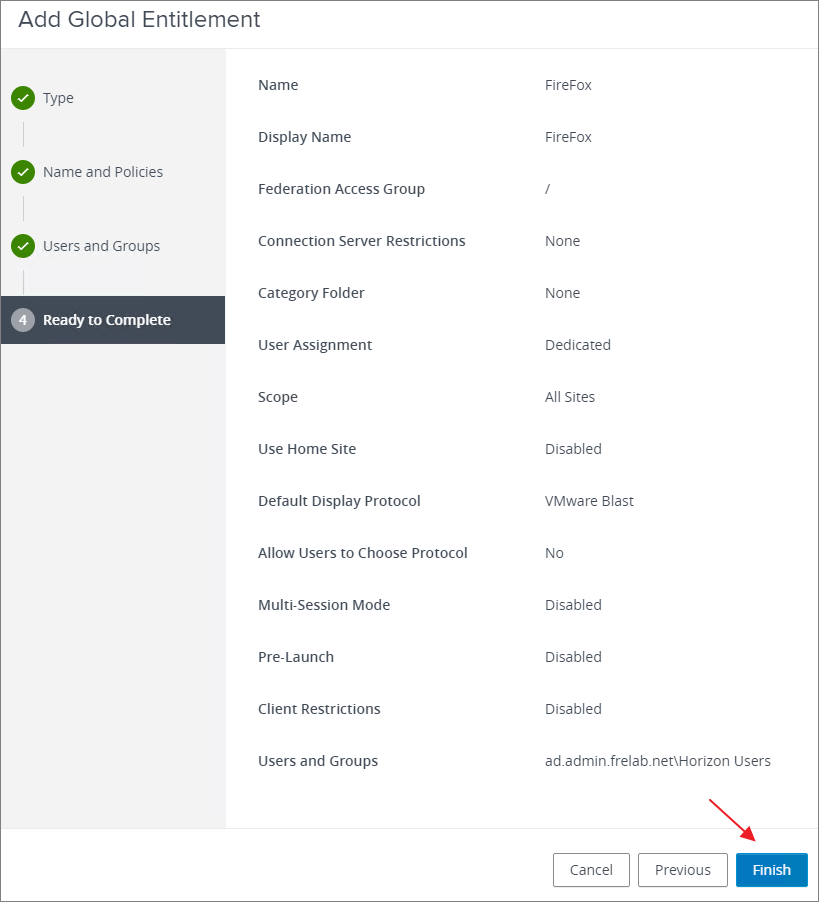
I provide a somewhat informative Name and Display Name, enter the settings for this Application Entitlement, Next…

Next, I will add the user group I have deemed worthy of this entitlement.
Having finished all my settings for this Global Entitlement, I click Finish…
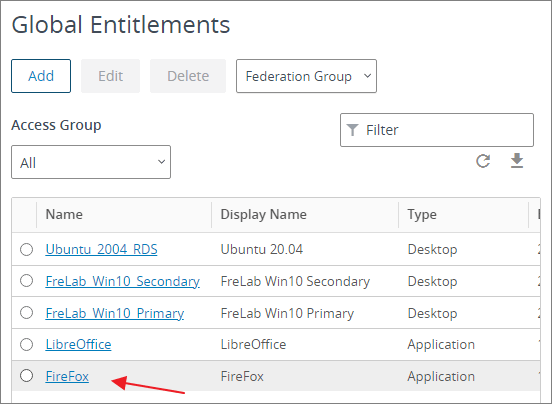
The Global Entitlement for the FireFox Application Pool is now ready, it’s now time to add an Application Pool to this entitlement. To do this I select the entitlement.
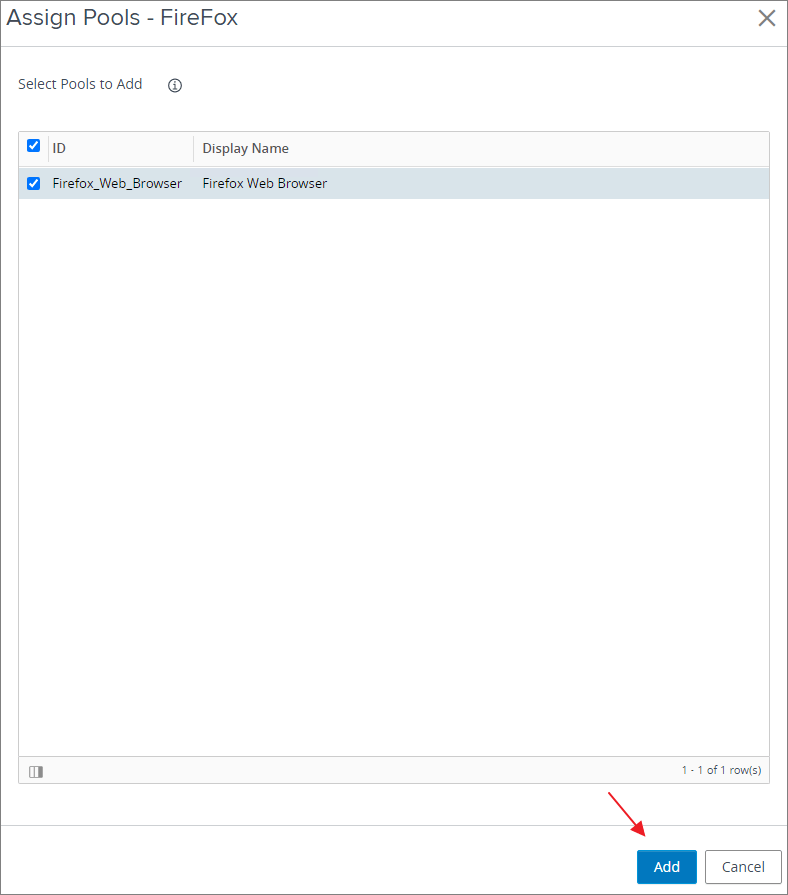
From the Local Pools tab I click Add and select an Application Pool


Test Application Pool
Test Application Pool
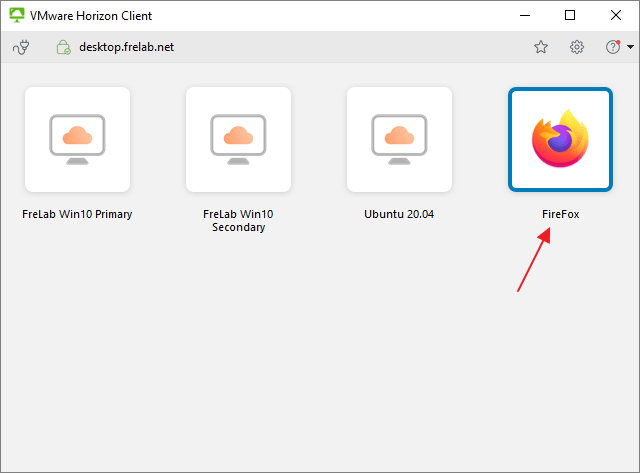
I launch my VMware Horizon Client and verify that the new entitlement is ready for use. I launch the browser and verify functionality.
Inside VMware Horizon Administrator, I see that my session is connected to my Application Pool, everything working as expected.
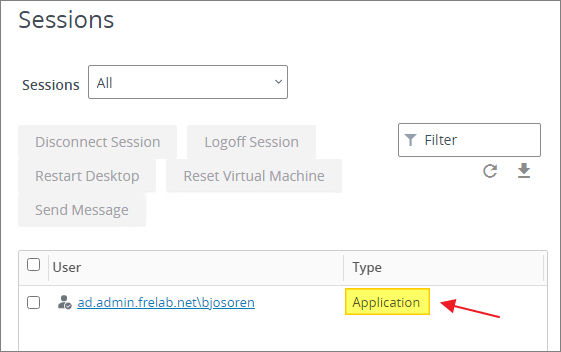
And with that, I finally have a working multi-session Instant Clone Desktop and Application Pool using Ubuntu 20.04 desktops.
VMware Horizon View planning, deployment etc.
VMware’s official documentation: Setting Up Linux Desktops in Horizon
Disclaimer: Every tips/tricks/posting I have published here, is tried and tested in different it-solutions. It is not guaranteed to work everywhere, but is meant as a tip for other users out there. Remember, Google is your friend and don’t be afraid to steal with pride! Feel free to comment below as needed.